
283: Authentication With Sorcery
(view original Railscast)
Other translations:


Back in episode 250 [watch, read] we added authentication to a Rails application from scratch. If you prefer to use an existing third-party solution there are a number of gems that will do some of the work for you and in this episode we’ll take a look at one called Sorcery.
Sorcery is a simple solution. It offers only about twenty methods but these are enough to provide all the authentication features we’ll need. Despite its simplicity it is full-featured and also modular so that we can choose to enable only the parts we need, such as password resetting, activity logging and so on. Sorcery works at a lower level than other authentication gems leaving it up to us to write the controller and view layers. In this episode we’ll use it to add authentication to an existing Rails application.
Getting Started
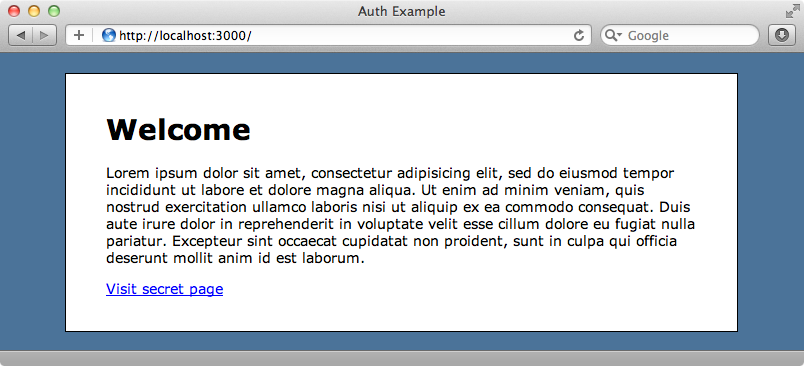
The application we’ll be working with is very simple. It has a welcome page that has a link to a “secret” page. The secret page can currently be viewed by anyone but we want to restrict it to only users who have logged in. To do this we’ll need to add authentication to the application and this is where Sorcery comes in.
Sorcery comes as a gem and is installed in the usual way by adding a reference to it in the Gemfile and then running bundle.
/Gemfile
gem 'sorcery'
Once Bundler has finished we’ll need to run the following command to add Sorcery’s initializer file. (More about this later.)
$ rake sorcery:bootstrap
Next we’ll generate a sorcery_migration. We use this to choose the Sorcery modules we want to to include. We’ll include the core module which is necessary for simple, password-based authentication and the remember_me module. For a full list of the modules check Sorcery’s README.
$ rails g sorcery_migration core remember_me
      create  db/migrate/20110914221626_sorcery_core.rb
      create  db/migrate/20110914221627_sorcery_remember_me.rb
The command creates a number of migration files depending on the modules we’ve chosen. If we look at the sorcery_core migration we’ll see the attributes that are added to the new users table.
/db/migrate/20110914221626_sorcery_core.rb
class SorceryCore < ActiveRecord::Migration
  def self.up
    create_table :users do |t|
      t.string :username,         :null => false
      t.string :email,            :default => nil
      t.string :crypted_password, :default => nil
      t.string :salt,             :default => nil
      t.timestamps
    end
  end
  def self.down
    drop_table :users
  end
end
By default the migration creates a username field. We don’t want a username field as well as an email field so we’ll comment that line out.
/db/migrate/20110914221626_sorcery_core.rb
class SorceryCore < ActiveRecord::Migration
  def self.up
    create_table :users do |t|
      # t.string :username,         :null => false
      t.string :email,            :default => nil
      t.string :crypted_password, :default => nil
      t.string :salt,             :default => nil
      t.timestamps
    end
  end
end
We’ll also need to configure Sorcery so that it uses email instead of username. We do this by modifying Sorcery’s initializer file. At the top of this file we need to specify the modules that we want to enable. Apart from the core module we’re only using remember_me so this is the only one we need to add here.
/config/initializers/sorcery.rb
# The first thing you need to configure is which modules you need in your app.
# The default is nothing which will include only core features (password encryption, login/logout).
# Available submodules are: :user_activation, :http_basic_auth, :remember_me,
# :reset_password, :session_timeout, :brute_force_protection, :activity_logging, :external
Rails.application.config.sorcery.submodules = [:remember_me]
# Rest of file omitted.
There are many other configuration options we can enable and set here and they’re all nicely documented in the file. We won’t need to change most of them, but one we do have to alter is username_attribute_name. We’ll enable this option and change its value to :email as that’s the field we’re using to identify users.
/config/initializers/sorcery.rb
config.user_config do |user|
  # -- core --
  user.username_attribute_name = :email
	# change default username
	# attribute, for example,
	# to use :email as the login.
	# Other options omitted.
end
# This line must come after the 'user config' block.
config.user_class = "User"
# define which model authenticates
# with sorcery.
end
At the bottom of the file is a configuration item that specifies the name of the model that Sorcery uses for authentication, by default User. Our application doesn’t have a User model yet so we’ll create one now. We already have a migration file to specify the fields for User so we’ll tell Rails not to generate one when it creates the model.
$ rails g model user --skip-migration
To enable Sorcery in the User model we just have to add one line of code.
/app/models/user.rb
class User < ActiveRecord::Base
  authenticates_with_sorcery!
end
This adds a number of methods to the User model to handle authentication. It doesn’t, however, add validations or protect any attributes; it’s up to us to add these.
/app/models/user.rb
class User < ActiveRecord::Base
  authenticates_with_sorcery!
  attr_accessible :email, :password, :password_confirmation
  validates_confirmation_of :password
  validates_presence_of :password, :on => :create
  validates_presence_of :email
  validates_uniqueness_of :email
end
Now is a good time to run the migrations so that the users table is created.
$ rake db:migrate
Adding Controllers and Views
Now that we have the User model set up we’ll generate some controllers to go with it. First we’ll create a UsersController to handle the sign-up process.
$ rails g controller users new
We’ll also need a SessionsController to handle logging in.
$ rails g controller sessions new
This is similar to what we did in episode 250 when we created authentication from scratch so we’ll go through this fairly quickly. The UsersController will be pretty standard, building a new User in the new action and creating a new User from the supplied parameters in create.
/app/controllers/users_controller.rb
class UsersController < ApplicationController
  def new
    @user = User.new
  end
  def create
    @user = User.new(params[:user])
    if @user.save
      redirect_to root_url, :notice => "Signed up!"
    else
      render :new
    end
  end
end
The new template will be fairly standard too, with a form for creating a new user with email, password and password_confirmation fields along with some code for showing any validation errors.
/app/views/users/new.html.erb
<h1>Sign Up</h1>
<%= form_for @user do |f| %>
  <% if @user.errors.any? %>
    <div class="error_messages">
      <h2>Form is invalid</h2>
      <ul>
        <% for message in @user.errors.full_messages %>
          <li><%= message %></li>
        <% end %>
      </ul>
    </div>
  <% end %>
  <div class="field">
    <%= f.label :email %>
    <%= f.text_field :email %>
  </div>
  <div class="field">
    <%= f.label :password %>
    <%= f.password_field :password %>
  </div>
  <div class="field">
    <%= f.label :password_confirmation %>
    <%= f.password_field :password_confirmation %>
  </div>
  <div class="actions"><%= f.submit %></div>
<% end %>
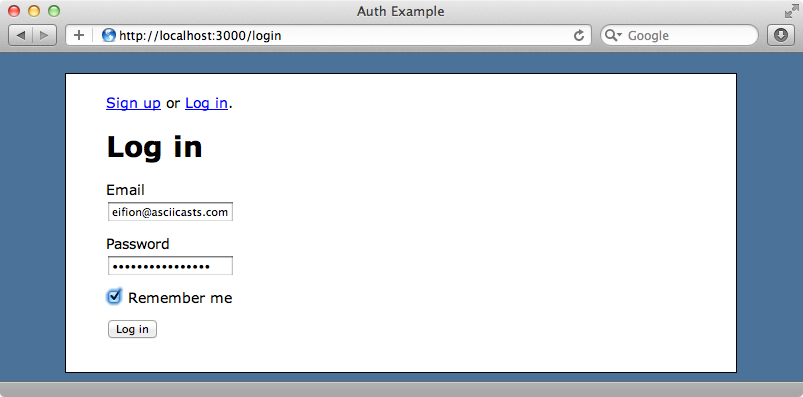
Things get more interesting in the SessionsController. We have a new action here, but we don’t need to add any code to it so we’ll move on to the template. Here we’ll need a simple login form with textfields for the email and password, and a checkbox for the remember_me field.
/app/views/sessions/new.html.erb
<h1>Log in</h1>
<%= form_tag sessions_path do %>
  <div class="field">
    <%= label_tag :email %>
    <%= text_field_tag :email, params[:email] %>
  </div>
  <div class="field">
    <%= label_tag :password %>
    <%= password_field_tag :password %>
  </div>
  <div class="field">
    <%= check_box_tag :remember_me, 1, params[:remember_me] %>
    <%= label_tag :remember_me %>
  </div>
  <div class="actions"><%= submit_tag "Log in" %></div>
<% end %>
We’ll need to write a create action to process the login form. Sorcery provides a method called login that can take three parameters: a username or email address, a password that was entered and the value of the remember_me checkbox. This method will perform the authentication and return a User if a matching one is found. We can check for this and redirect back to the home page if a user is found. If not we’ll display a flash message and show the login form again.
/app/views/controllers/sessions_controller.rb
class SessionsController < ApplicationController
  def new
  end
  def create
    user = login(params[:email], params[:password], ↵
      params[:remember_me])
    if user
      redirect_back_or_to root_url, :notice => "Logged in!"
    else
      flash.now.alert = "Email or password was invalid."
    end
  end
end
Instead of using redirect_to to redirect back to the home page when a user is found we’ll use a method that Sorcery gives us called redirect_back_or_to. This behaves similarly to redirect_to but if a URL is stored by Sorcery it will redirect back to that URL rather than to the one specified in the code. This is useful because it means that if we require a user to log in when they visit a certain page Sorcery will take them to the login page and then return them back to the page they tried to visit once they’d successfully logged in.
We still need a way for a user to be able to log out so we’ll also add a destroy action to the controller. Sorcery provides a method called logout and that’s all we need to call to log the user out. Once we’ve logged a user out we’ll redirect them back to the home page.
/app/views/controllers/sessions_controller.rb
def destroy
  logout
  redirect_to root_url, :notice => "Logged out!"
end
Next we’ll go into our routes file and wire everything up, replacing the default generated actions with these routes:
/config/routes.rb
Auth::Application.routes.draw do
  get "logout" => "sessions#destroy", :as => "logout"
  get "login" => "sessions#new", :as => "login"
  get "signup" => "users#new", :as => "signup"
  resources :users
  resources :sessions
  get "secret" => "home#secret", :as => "secret"
  root :to => "home#index"
end
We now have various named routes and a couple of resources to handle all of the functionality related to authentication.
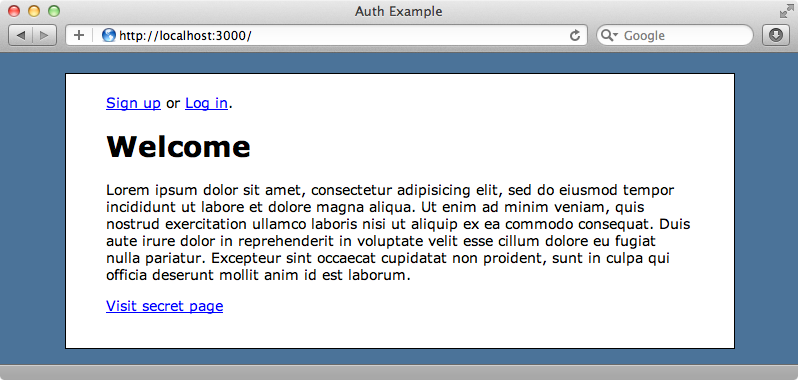
Now that we have these new pages we’ll need some links so that users can access them. We’ll add them to the layout page so that they’re visible on every page of the application. We have a current_user method available to us so we can check to see if we have a logged-in user. If we have we’ll show their email address along with a “Log out” link. If there’s no current user we’ll show links to pages that will let them either sign up or log in.
/app/views/layouts/application.html.erb
<!DOCTYPE html>
<html>
<head>
  <title>Auth Example</title>
  <%= stylesheet_link_tag    "application" %>
  <%= javascript_include_tag "application" %>
  <%= csrf_meta_tags %>
</head>
<body class="<%= params[:controller] %>">
  <div id="container">
    <div class="user_nav">
      <% if current_user %>
        Logged in as <%= current_user.email %>.
        <%= link_to "Log out", logout_path %>
      <% else %>
        <%= link_to "Sign up", signup_path %> or
        <%= link_to "Log in", login_path  %>.
      <% end %>
    </div>
    <% flash.each do |name, msg| %>
      <%= content_tag :div, msg, :id => "flash_#{name}" %>
    <% end %>
    <%= yield %>
  </div>
</body>
</html>
We’re ready now. to test the site out. If we go to the home page we’ll now see the “Sign up” and “Log in” links.
If we click “Sign up” we’ll see the signup form and we can register on the site. We can then click “Log in” and log in with our registration information.
Authorization
Now we’re logged into the site we can visit the secret page. If we log out and try to visit the secret page, though, we can still see it. We need to add some authorization to restrict the page to logged-in users.
The secret page is an action in the HomeController. We can use a before_filter that Sorcery provides called require_login to limit access to actions. We’ll use it to restrict access to the secret action.
/app/controllers/home_controller.rb
class HomeController < ApplicationController
  before_filter :require_login, :only => :secret
  def index
  end
  def secret
  end
end
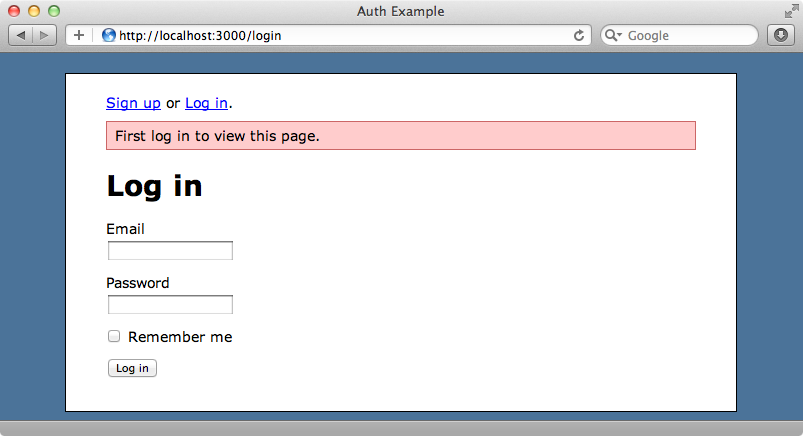
When this filter is triggered Sorcery calls its not_authenticated method. It’s a good idea to override this method in the ApplicationController so that we can control what happens when the authorization fails. We’ll redirect to the login page and show an alert message.
/app/controllers/application_controller.rb
class ApplicationController < ActionController::Base
  protect_from_forgery
  private
  def not_authenticated
    redirect_to login_url, :alert => "First log in to view ↵
    this page."
  end
end
If we try to visit the secret page now while logged-out we’ll be redirected to the login page and the alert message will be shown.
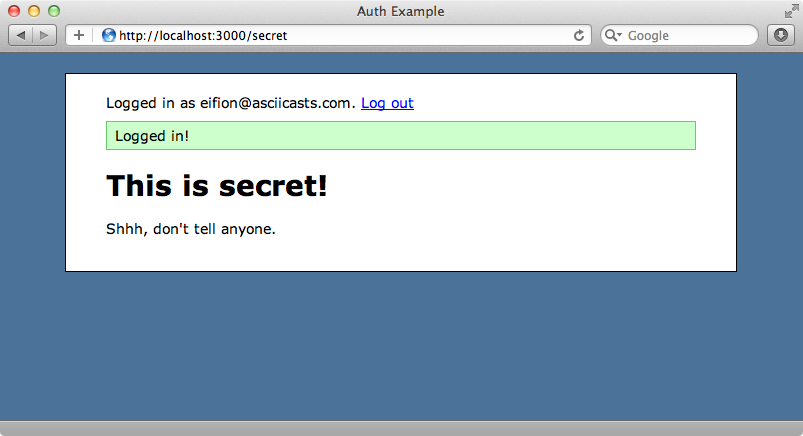
When we log in we’ll be redirected back to the secret page as Sorcery will remember the page we were trying to visit when we were redirected to the login page.
That’s it for our episode on Sorcery. It comes with many more features that we’ve covered here and which are covered in the documentation. If you’re looking for an authentication solution that works at a slightly lower level then Sorcery is well worth taking a look at.