
284: Active Admin
(view original Railscast)
Other translations:


In this episode we’ll take a look at Active Admin. This gem lets you easily add an admin interface to your Rails applications. It creates good-looking admin pages and is very customizable. You can see it in action by taking a look at the live demo.
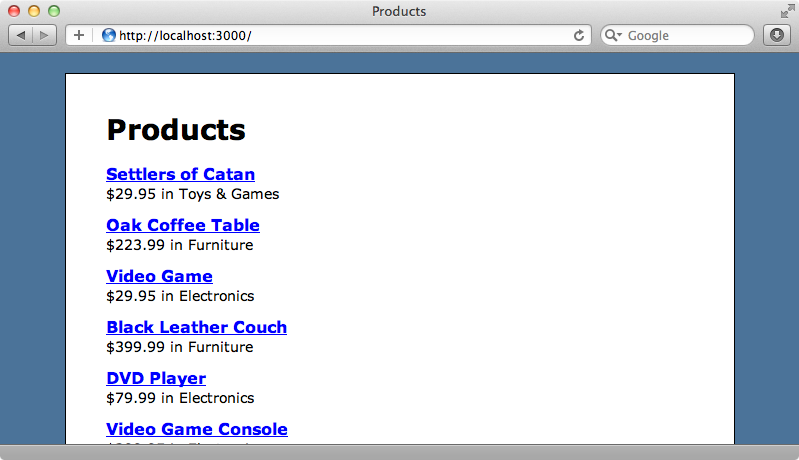
In this episode we’ll add Active Admin to an existing Rails application. The app we’ll be working with is a simple e-commerce app that has number of products, each of which has a price and belongs to a category. We’ll use Active Admin to create an admin interface so that we can manage the products.
Installing Active Admin
Active Admin is distributed as a gem and installed in the usual way, by adding a reference to it in the Gemfile and then running bundle. Our application is a Rails 3.1 app so we’ll need to make sure that we also include the sass-rails gem as Active Admin depends it. Under Rails 3.0 this isn’t an issue and we don’t need to include it.
/Gemfile
gem 'activeadmin'
Once Bundler has finished we need to run a generator to add Active Admin to our application. This generator will give us instructions on some additional setting-up we’ll need to do after it has run. We need to add the host option to the Mailer configuration in the development environment; make sure we have a root URL and add notice and alert flash messages to the application’s layout file.
$ rails g active_admin:install
      invoke  devise
    generate    devise:install
      create    config/initializers/devise.rb
      create    config/locales/devise.en.yml
==================================================================
Some setup you must do manually if you haven't yet:
  1. Setup default url options for your specific environment. Here is an example of development environment:
       config.action_mailer.default_url_options = { :host => 'localhost:3000' }
     This is a required Rails configuration. In production it must be the actual host of your application
  2. Ensure you have defined root_url to *something* in your config/routes.rb.
     For example:
       root :to => "home#index"
  3. Ensure you have flash messages in app/views/layouts/application.html.erb. For example:
       <p class="notice"><%= notice %></p>
       <p class="alert"><%= alert %></p>
We’ve already done all of this for our application so we’re ready to continue.
The command also creates some migrations so we’ll run them now.
$ rake db:migrate
Using Active Admin
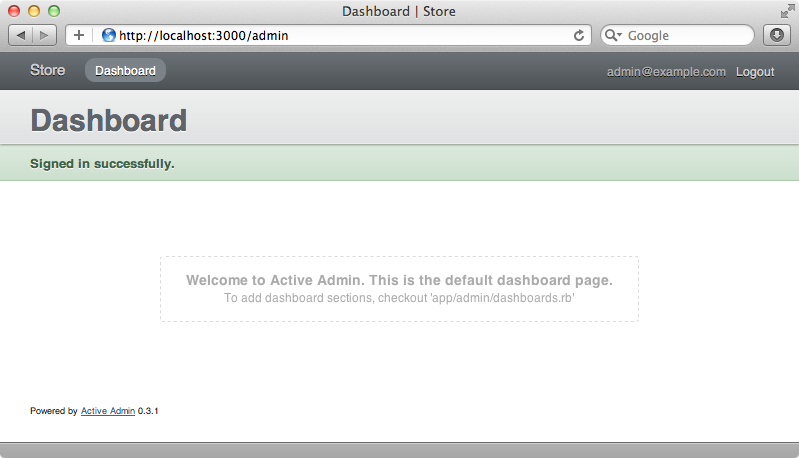
If we look at Active Admin’s documentation we’ll see that when we install it it creates a user with the username admin@example.com and the password password. We can use these credentials to log in. (You can customize the username and password by editing the devise_create_admin_users.rb migration file before running the migrations.) If we visit http://localhost:3000/admin with the Rails server running we’ll see a login form where we can log in with the credentials shown above.

After we’ve logged in we’ll be taken to Active Admin’s dashboard although there won’t be much to see yet.
We want to manage our products so we’ll add our Product resource to Active Admin by running this command:
$ rails g active_admin:resource product
      create  app/admin/products.rb
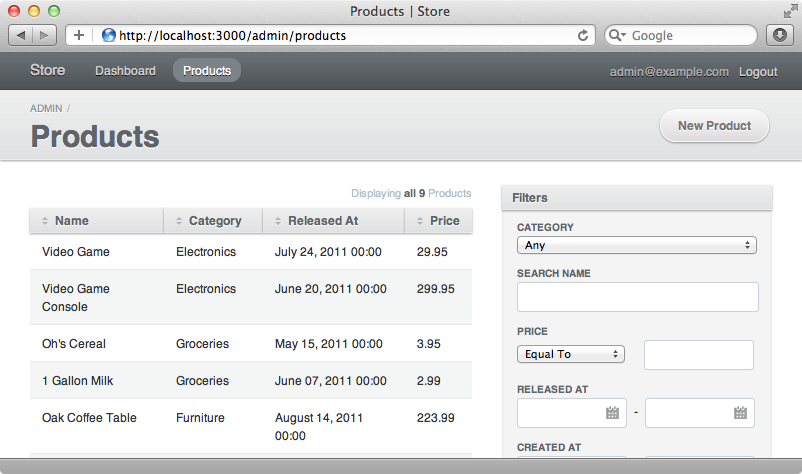
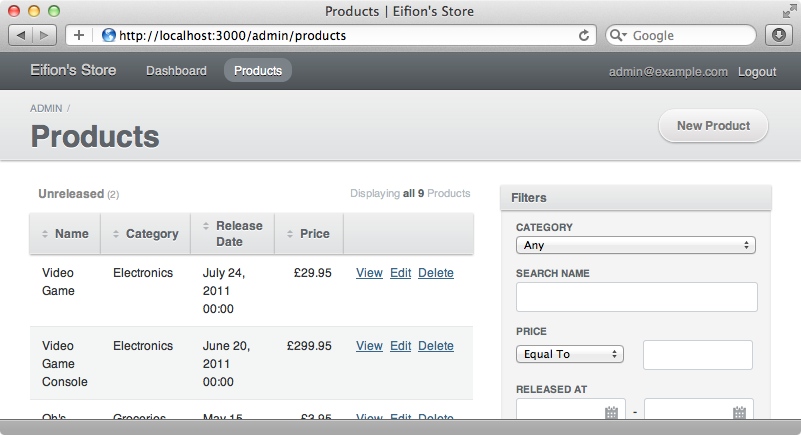
This generator creates a products.rb file under the application’s app/admin directory. When we refresh the admin dashboard we’ll see a “Products” link; if we click this link we’ll be taken to a page that has everything we need to manage our products.
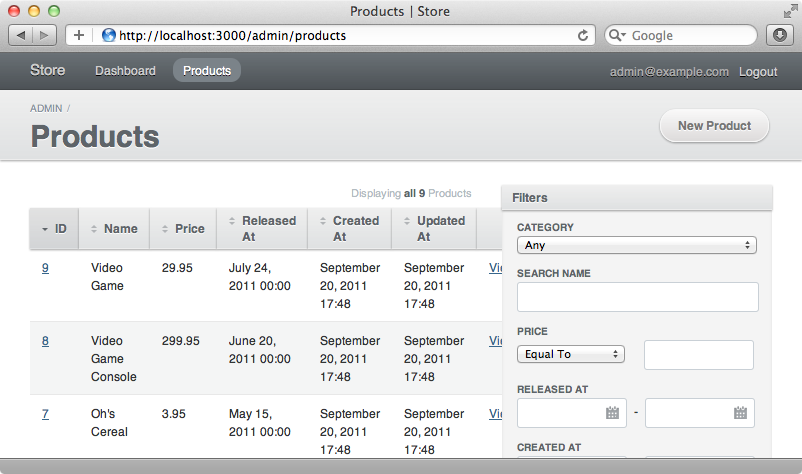
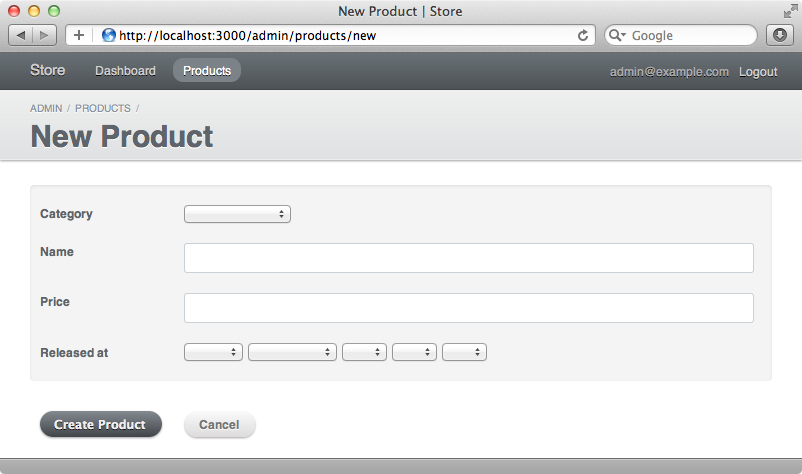
This page has options to sort or filter the products by any attribute. Active Admin will even detect the belongs_to relationship with Category and give us a dropdown menu so that we can filter products by their category. This works when we create a new product, too. The category is shown as a dropdown list and the other attributes will have input fields based on their datatype.
Customizing this functionality is easy. We’ll start by customizing the products index page and reducing the number of columns that are shown. To do this we modify the /app/admin/products.rb file that was generated earlier. We change the index page by overriding the index method. This method takes a block, inside which we specify the columns we want to see on the page by calling column.
/app/admin/products.rb
ActiveAdmin.register Product do
  index do
    column :name
    column :category
    column :released_at
    column :price
  end
end
When we reload the products page now we’ll see it shows the columns we want.
Note that the Category association has been detected automatically and the correct category is shown against each product.
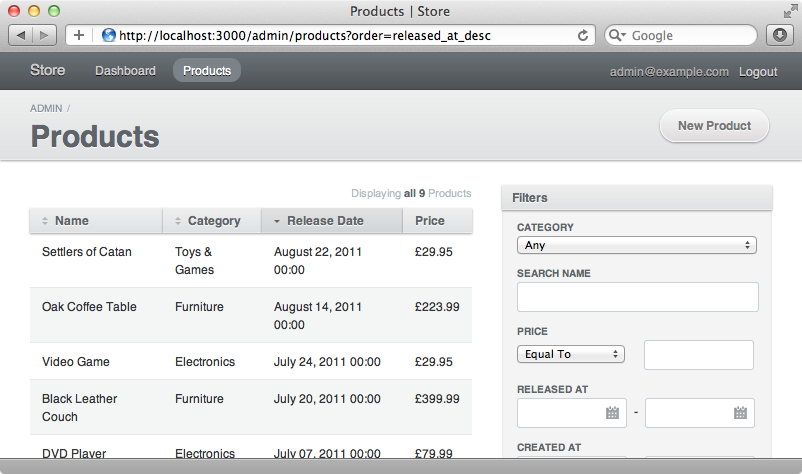
We can take this customization further and change the title of a column by passing a title in as the first argument to column. We’ll use this to change the name of the released_at field.
/app/admin/products.rb
ActiveAdmin.register Product do
  index do
    column :name
    column :category
    column "Release Date", :released_at
    column :price
  end
end
If we want to change a column’s values we can do so by passing a block to column. The price field doesn’t currently show a currency symbol but we can modify it to do so. The column method can take a block and when we add one the current model instance, in this case a Product, is passed into that block. Whatever the block returns will be shown in that column. We have access to helper methods here and so we can use number_to_currency to display the price correctly.
/app/admin/products.rb
ActiveAdmin.register Product do
  index do
    column :name
    column :category
    column "Release Date", :released_at
    column :price do |product|
      number_to_currency product.price, :unit => "£"
    end
  end
end
If we reload the page now we’ll see the changed “Release Date” title and each product’s price displayed as a currency value.
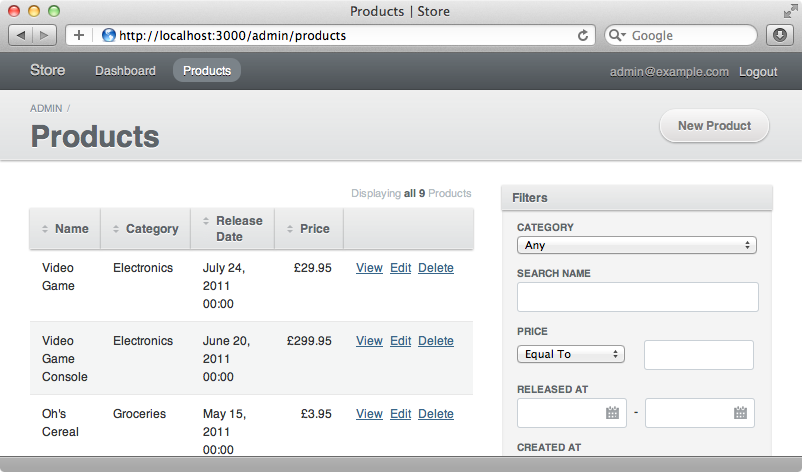
Customizing the value returned by the price field means that the field is no longer sortable. Also we no longer have edit and destroy links for each item. We’ll fix that now. Whenever we use a block to customize a value we should also use the :sortable option to tell Active Admin how to sort that field. We’ll do that now and also add a call to default_actions to bring back the edit and destroy links.
/app/admin/products.rb
ActiveAdmin.register Product do
  index do
    column :name
    column :category
    column "Release Date", :released_at
    column :price, :sortable => :price do |product|
      number_to_currency product.price, :unit => "£"
    end
    default_actions
  end
end
The price field is now showing the currency symbol but it would be better if the values were right-aligned too. We can do this with CSS but to do so we’ll need a way to reference the column first. Active Admin provides a way to generate HTML that is very similar to Markaby. All we need to do is call a method with the name of the tag that we want to generate. We can pass in a :class option here to give the tag something we can reference in our CSS.
/app/admin/products.rb
ActiveAdmin.register Product do
  index do
    column :name
    column :category
    column "Release Date", :released_at
    column :price, :sortable => :price do |product|
      div :class => "price" do
        number_to_currency product.price, :unit => "£"
      end
    end
    default_actions
  end
end
We can now style this column by modifying the active_admin.css.scss file.
/app/assets/stylesheets/active_admin.css.scss
// Active Admin CSS Styles
@import "active_admin/mixins";
@import "active_admin/base";
// To customize the Active Admin interfaces, add your
// styles here:
.price {
  text-align :right;
}
The price column will now be aligned correctly.
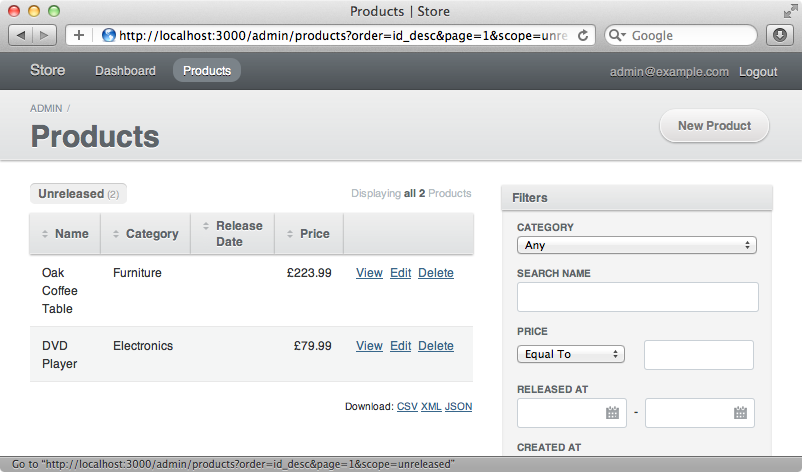
Scopes
Scopes are another great feature of Active Admin. These act like a pre-set filter and there are two steps to creating one. First we add a call to scope in Active Admin’s configuration file for our products, passing in the name of a scope.
/app/admin/products.rb
ActiveAdmin.register Product do
  scope :unreleased
  index do
    column :name
    column :category
    column "Release Date", :released_at
    column :price, :sortable => :price do |product|
      div :class => "price" do
        number_to_currency product.price, :unit => "£"
      end
    end
    default_actions
  end
end
Secondly we have to write that scope in the Product model.
/app/models/product.rb
class Product < ActiveRecord::Base
  belongs_to :category
  scope :unreleased, where(:released_at => nil)
end
If we reload the products admin page now we’ll see the scope listed. When we click it we’ll be shown a list of products filtered by that scope.
Customizing The Dashboard
Next we’ll take a look at customizing the dashboard. It’s empty by default so we’ll modify it to show a list of the most recent products. We do this by modifying the /app/admin/dashboards.rb file. There’s some useful documentation in this file’s comment explaining how the various customizations work.
To add a section to the dashboard we use the section method. We want to list the recent products in a table and we can do so by using the table_for command. Inside its block we specify the columns we want to show with column the same way we did when we customized the products index admin page. We’ll also add a link back to the page that shows all of the products.
/app/admin/dashboards.rb
ActiveAdmin::Dashboards.build do
  section "Recent Products" do
    table_for Product.order("released_at desc").limit(5) do
      column :name
      column :released_at
    end
    strong { link_to "View All Products", admin_products_path }
  end
end
When we reload the dashboard now we’ll see the five most recently released products along with that link.
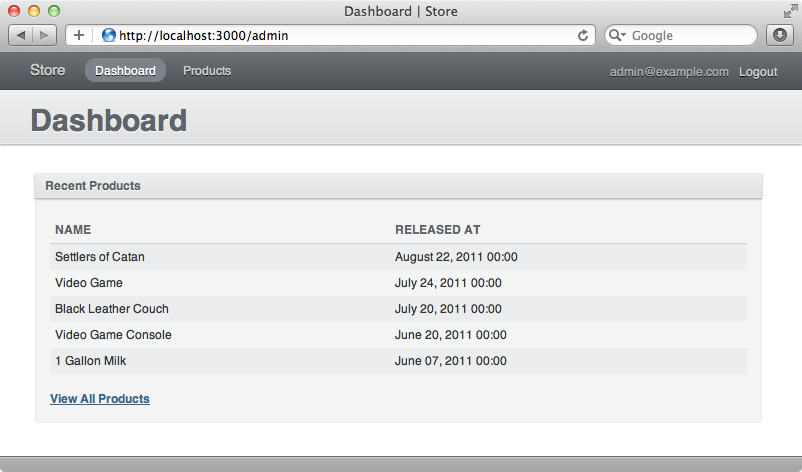
The page would be more useful if each product in the list linked to that product’s admin page. We can do that by passing a block to the column method again, just like we did with the price column earlier.
/app/admin/dashboards.rb
ActiveAdmin::Dashboards.build do
  section "Recent Products" do
    table_for Product.order("released_at desc").limit(5) do
      column :name do |product|
        link_to product.title, admin_product_path(product)
      end
      column :released_at
    end
    strong { link_to "View All Products", admin_products_path }
  end
end
There’s a shorter way to define the path in link_to. Instead of using admin_product_path(product) we can pass in an array with a symbol as the first element and the product as the second, like this:
link_to product.title, [:admin, product]
If we reload our dashboard now we’ll see each product’s title shown as a link. When we click one of the links we’re taken to the admin page for that product.
Fixing The Stylesheets
There’s a problem we need to be aware of when using Active Admin under Rails 3.1 and we can see it by going back to the main site.
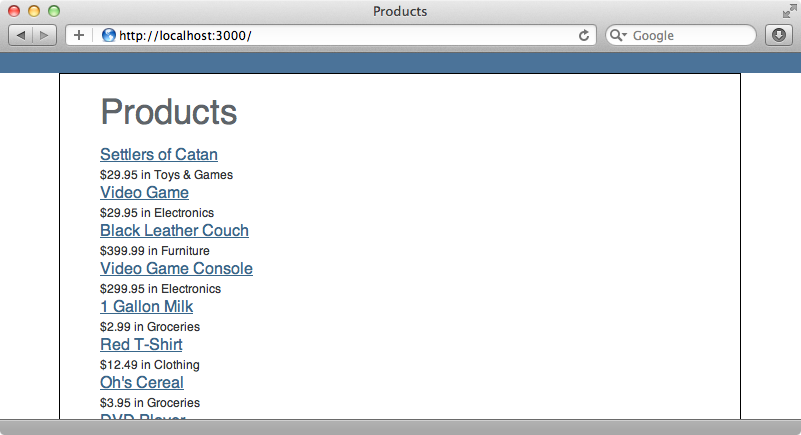
The page doesn’t look like it did before because Active Admin’s stylesheet is being included on every page. Rails 3.1 includes all stylesheets by default due to the line require_tree . in the application.css manifest file. This isn’t what we want and anyway it’s good idea to remove this line to give us more control over our application’s stylesheets. We only have one other stylesheet in the main application so we’ll replace require_tree . with require products.
/app/assets/stylesheets/application.css
/*
 * This is a manifest file that'll automatically include all the stylesheets available in this directory
 * and any sub-directories. You're free to add application-wide styles to this file and they'll appear at
 * the top of the compiled file, but it's generally better to create a new file per style scope.
 *= require_self
 *= require products
*/
/* Rest of file omitted */
An even better solution is to switch over to the SASS import command. We can switch our application’s main CSS file over to SASS by adding a .scss extension to its name. We can then remove the manifest from the top of the file (the part of the file you can see in the code snippet above) and add the import command at the bottom.
/app/assets/stylesheets/application.css.scss
/* Styles omitted */
@import "products";
When we reload the homepage now only the correct stylesheets are included and the page looks correct.
Global Configuration
Active Admin has another configuration file in the /config/initializers directory and we’ll spend the rest of this episode taking a look at it. The file contains a large number of configuration options, most of which are commented out. One that isn’t is the admin site’s title and we’ll change that.
/config/initializers/active_admin.rb
ActiveAdmin.setup do |config|
  # == Site Title
  #
  # Set the title that is displayed on the main layout
  # for each of the active admin pages.
  #
  config.site_title = "Eifion's Store"
  # Other configuration options omitted.
end
We’ll need to restart the server for the change to be picked up, but when we do the new title will be shown.
That’s it for this episode. There’s plenty more to Active Admin that we haven’t covered here and it’s well worth taking a look at the documentation to see what else it can do. We can customize the look and functionality of all of Active Admin’s pages to suit our needs and this makes it a powerful solution to adding administrative functionality to your Rails applications.