
265: Rails 3.1 Overview
(view original Railscast)
Other translations:


The first beta of Rails 3.1 has just been released and over the next few episodes we’ll covering some of its new features. We’ll start this time by showing how to get it set up on and then giving an overview of some of the new functionality it offers.
Installing Rails 3.1
Before we install the Rails 3.1 beta gem we’ll use rvm to create a gemset so that we can isolate the install from the rest of our environment and use it without affecting our Rails 3.0 installation. We can create a gemset called railspre by running this command:
$ rvm 1.9.2@railspre --create
We can then install the Rails beta under that gemset by running
$ gem install rails --pre
This will install a number of gems and once they’re all installed we can check our Rails version to make sure that everything has installed correctly.
$ rails -v
Rails 3.1.0.beta1
Now that we have the beta installed we can create our first Rails 3.1 application.
$ rails new todo
Rails 3.1 uses jQuery as its default JavaScript library. If we want to create a new application that uses Prototype we can use the -j option to do this.
$ rails new todo -j prototype
Before we start to look at our new application we’ll cd to its directory and run bundle to install the application’s gems. After they have installed we can take a look at the application’s structure.
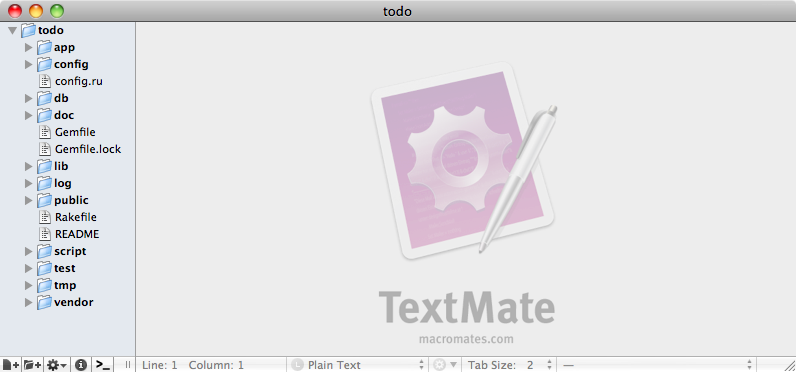
This is how the directory structure looks in TextMate. (Note that we’re using the MissingDrawer plugin here to show the directory structure in a sidebar rather than as the default drawer.)
We’ll take a look at the Gemfile first. Here it is:
/Gemfile
source 'http://rubygems.org'
gem 'rails', '3.1.0.beta1'
# Bundle edge Rails instead:
# gem 'rails',     :git => 'git://github.com/rails/rails.git'
gem 'sqlite3'
# Asset template engines
gem 'sass'
gem 'coffee-script'
gem 'uglifier'
gem 'jquery-rails'
# Use unicorn as the web server
# gem 'unicorn'
# Deploy with Capistrano
# gem 'capistrano'
# To use debugger
# gem 'ruby-debug19', :require => 'ruby-debug'
group :test do
  # Pretty printed test output
  gem 'turn', :require => false
end
The first few lines of the file don’t contain any surprises, but then we come to a section marked “Asset template engines”. Rails now comes with SASS and CoffeeScript enabled by default and we’ll explore these more in future episodes. This section also contains a gem called Uglifier which minifies the application’s JavaScript code in production mode and the jquery-rails gem. If we were using Prototype then this would be prototype-rails instead.
At the bottom of the file is a reference to the turn gem which makes test output prettier and which we’ll cover a little later.
Template Changes
The biggest change here is in how assets are handled by the template engines. If we open up the application’s /public directory we’ll see that the javascripts and stylesheets directories are no longer there.
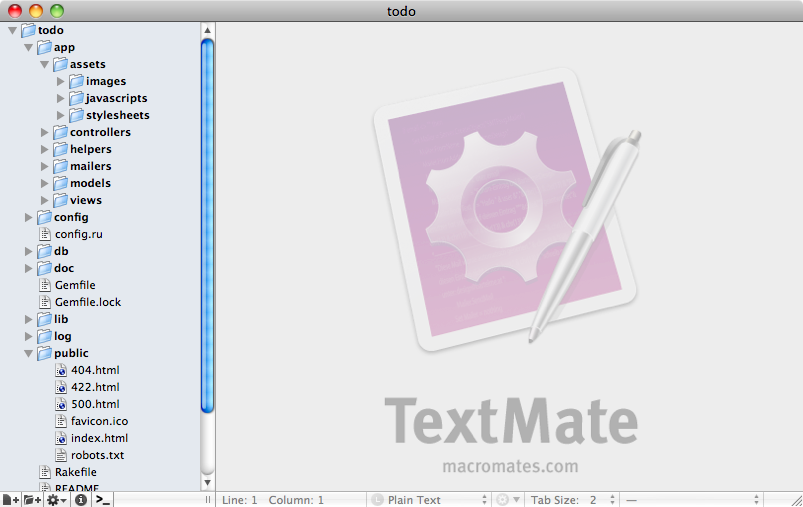
If these directories have gone, where should we put our JavaScript and CSS code? The answer is that they now go in the new /app/assets directory. If we open the javascripts directory here we’ll see an application.js file but if we look at it we’ll see that this isn’t where we’re supposed to put the application’s JavaScript code.
/app/assets/javascripts/application.js
// FIXME: Tell people that this is a manifest file, real code should go into discrete files
// FIXME: Tell people how Sprockets and CoffeeScript works
//
//= require jquery
//= require jquery_ujs
//= require_tree .
This file is designed to be a manifest file. Instead of writing JavaScript code in here it should be placed in other files in the same directory. To get an idea as to how this should work we’ll generate a scaffold in our application for a Project.
$ rails g scaffold project name:string
If we look at the output from this command we’ll see that some files have been generated in the app/assets directory.
      create  app/assets/stylesheets/scaffold.css.scss
      invoke  assets
      create    app/assets/javascripts/projects.js.coffee
      create    app/assets/stylesheets/projects.css.scss
The files include a CSS file, but with an extension of .scss and a JavaScript file with a .coffee extension. We’ll take a look at these files shortly but first we’ll migrate the database so that the new projects table is created.
$ rake db:migrate
The generated SCSS files look much like standard CSS at first glance, but if we look towards the bottom we’ll see some differences, including nested rules. This is a SASS-specific feature and we’ll be taking a closer look at SASS in a future episode.
/app/assets/stylesheets/scaffold.css.scss
#error_explanation {
  width: 450px;
  border: 2px solid red;
  padding: 7px;
  padding-bottom: 0;
  margin-bottom: 20px;
  background-color: #f0f0f0;
  h2 {
    text-align: left;
    font-weight: bold;
    padding: 5px 5px 5px 15px;
    font-size: 12px;
    margin: -7px;
    margin-bottom: 0px;
    background-color: #c00;
    color: #fff;
  }
  ul li {
    font-size: 12px;
    list-style: square;
  }
}
The scaffold has also generated a projects.css.scss file for CSS specific to the Projects pages and a projects.js.coffee file for projects-related JavaScript. Note that this is only a recommendation, all of the CSS and JavaScript files are loaded for every page as they’re all bundled into one JavaScript and one CSS file.
If we start up our application’s server and visit the projects page we’ll see in the page’s source that two files are included.
<link href="/assets/application.css" media="screen" ↵
  rel="stylesheet" type="text/css" />
<script src="/assets/application.js" type="text/javascript"> ↵
</script>
These two files contain bundled-up versions of the application’s JavaScript and CSS files and the contents of these files are based on the require lines in the application.js and application.css files. These lines determine which files are included and the order they’re added into the combined file.
/app/assets/javascripts/application.js
//= require jquery
//= require jquery_ujs
//= require_tree .
Behind the scenes Rails uses Sprockets to accomplish this. Sprockets takes all of the JavaScript or CSS files in an application and merges them into a single file that’s delivered to the client. This means that we can arrange the files in our application however we like and they’ll be combined into a single file. In production mode the files will be minified so that they can be downloaded as efficiently as possible.
In development mode the application.js and application.css files are reloaded automatically while in production mode they’re cached so there’s no decrease in performance while the CoffeeScript and SASS files are compiled.
Changes to Migrations
Let’s take a look at some of the other new features in Rails 3.1, starting with the database migration file that was generated with the scaffold we created earlier.
/db/migrate/20110511193808_create_projects.rb
class CreateProjects < ActiveRecord::Migration
  def change
    create_table :projects do |t|
      t.string :name
      t.timestamps
    end
  end
end
This migration is different from what we’re used to: instead of the usual up and down methods there’s just a single change method to handle the up and down migrations. In Rails 3.1 there’s no need to write both methods as long as they can be determined from the change method. This is a nice addition to ActiveRecord that will save time when creating migration code.
Identity Maps
Identity Maps are another great new addition to ActiveRecord. If we take a look at the application.rb configuration file we’ll see that they’re enabled by default.
/config/application.rb
# Enable IdentityMap for Active Record, ↵
to disable set to false or remove the line below.
config.active_record.identity_map = true
To get this working in the first beta of Rails 3.1 it might be necessary to hack this config file a little by adding another line of code.
/config/application.rb
# Enable IdentityMap for Active Record, ↵
to disable set to false or remove the line below.
config.active_record.identity_map = true
ActiveRecord::IdentityMap.enabled = true
What does the IdentityMap feature give us? To demonstrate it we’ll use it in the console. First we’ll create a new Project.
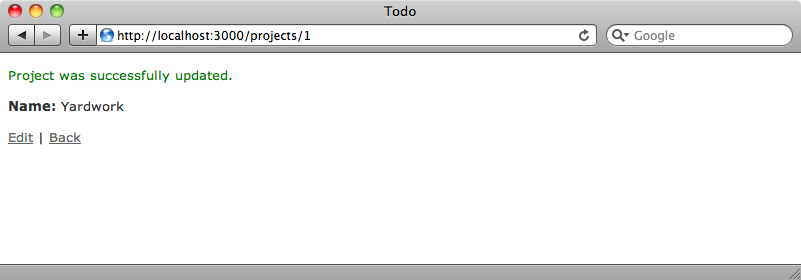
> p = Project.create!(:name => "Yardwork")
  SQL (81.4ms)  INSERT INTO "projects" ("created_at", "name", "updated_at") VALUES (?, ?, ?)  [["created_at", Fri, 13 May 2011 18:41:25 UTC +00:00], ["name", "Yardwork"], ["updated_at", Fri, 13 May 2011 18:41:25 UTC +00:00]]
 => #<Project id: 1, name: "Yardwork", created_at: "2011-05-13 18:41:25", updated_at: "2011-05-13 18:41:25">
The first thing to note is that the log is shown directly in the console so that we know exactly what SQL is being executed inline when the command is run.
Next we’ll fetch the newly-created Project by its id.
ruby-1.9.2-p180 :002 > p1 = Project.find(1)
  Project Loaded  From Identity Map (id: 1)
 => #<Project id: 1, name: "Yardwork", created_at: "2011-05-13 18:41:25", updated_at: "2011-05-13 18:41:25">
Note that in the console it says Project Loaded From Identity Map (id: 1). No SQL query is run to fetch the project from the database, Rails knows that that project is already loaded into memory and will use that exact instance. We can confirm this by checking that both the Project’s have the same object_id.
ruby-1.9.2-p180 :006 > p.object_id == p1.object_id
 => true
This means that we won’t have any problems when we’re setting attributes on one record and think that it’s the same record that we’re loading through an association. We can guarantee that it’ll be the same instance now.
Nested has_many :through Associations
There are a number of other new additions to ActiveRecord, such as nested has_many :through associations. Take a look at the following model code.
/app/models/project.rb
class Project < ActiveRecord::Base
  has_many :tasks
  has_many :assignments, :through => :tasks
  has_many :users, :through => :assignments
end
In earlier versions of Rails we couldn’t do this but in version 3.1 we can now nest has_many :through associations, which will come in useful in many situations.
Another new feature is the ability to assign roles to attr_accessible calls. For example we could make the name attribute accessible, but only to users in the admin role.
/app/models/project.rb
class Project < ActiveRecord::Base
  attr_accessible :name, :as => :admin
end
If we try to modify the Project we created in the console through the browser by changing its name from “Yardwork” to “Housework” the name won’t change as we’re not logged in as an admin.
We pass in roles through the controller, modifying the call to update_attributes with an :as option.
/app/controllers/projects_controller.rb
def update
  @project = Project.find(params[:id])
  respond_to do |format|
    if @project.update_attributes(params[:project], :as => :admin)
      format.html { redirect_to @project, notice: 'Project ↵
          was successfully updated.' }
      format.json { head :ok }
    else
      format.html { render action: "edit" }
      format.json { render json: @project.errors, ↵
        status: :unprocessable_entity }
    end
  end
end
If we try to update a Project through the form now it will work as we have the admin role.
View Layer Changes
We’ll finish off by showing some changes to the view layer. The first is small, but useful. Until now, if we have a file_field in a form we have to add :html => { :multipart => :true } to form_for so that any uploaded files were sent correctly. In Rails 3.1 there’s no need to do this and the correct enctype attribute is added to the opening form tag when the form contains a file_field.
Another new feature is a change to links. We can now pass in domain and subdomain options to URL helpers. Say that we have this code for a link:
<%= link_to 'Edit', edit_project_path(@project) %>
If we want these edit links to point to a different subdomain we can change this code as follows:
<%= link_to 'Edit', edit_project_url(@project, ↵
  :subdomain => 'foo') %>
The link will now point to the same page on the foo subdomain.
Better Test Output
Finally we’ll take a look at the improved test output. If we run rake test the output is cleaner and prettier as it uses the turn gem that we saw earlier in the Gemfile.
$ rake test
(in /Users/eifion/todo)
Loaded suite /Users/eifion/.rvm/gems/ruby-1.9.2-p180@global/gems/rake-0.8.7/lib/rake/rake_test_loader
Started
Finished in 0.003966 seconds.
0 tests, 0 assertions, 0 failures, 0 errors, 0 skips
Loaded suite /Users/eifion/.rvm/gems/ruby-1.9.2-p180@global/gems/rake-0.8.7/lib/rake/rake_test_loader
Started
ProjectsControllerTest:
     PASS should create project (0.16s)
     PASS should destroy project (0.01s)
     PASS should get edit (0.08s)
     PASS should get index (0.01s)
     PASS should get new (0.01s)
     PASS should show project (0.01s)
     PASS should update project (0.01s)
Finished in 0.307078 seconds.
7 tests, 10 assertions, 0 failures, 0 errors, 0 skips
There are are many more new features in Rails 3.1 that we haven’t covered here. Automated streaming, view inheritance, mountable engines and so much more and we’ll be covering these and more in future episodes.
For a complete list of the changes in Rails 3.1 take a look at this gist which lists them all.