
235: OmniAuth Part 1
(view original Railscast)
Other translations:


A couple of weeks ago episode 233 [watch, read] covered a service called Janrain Engage, a central location for managing authentication services such as Twitter, OpenID and Facebook. It is a great service but one of its downsides is that it acts as a middle man between your application and the authentication providers. A better solution would be a gem or plugin that would allow us to use third-party authentication in our app without requiring an external service.
Such a gem has recently appeared and it’s called OmniAuth. OmniAuth provides a single way to authenticate against a number of different services. If the service you want to authenticate against isn’t supported then OmniAuth makes it easy to add your own provider. OmniAuth is a collection of Rack middleware which gives us a lot of flexibility in how we can use it.
There’s a great article on the Rails Rumble blog that explains in detail how to add OmniAuth to a Rails application. The article shows you how to create authentication from scratch, but here we’ll show you how to integrate OmniAuth into an application with an existing authentication solution. Here we’ll use Devise, but you could just as easily integrate with Authlogic or some other custom authentication.
Adding OmniAuth to Our Application
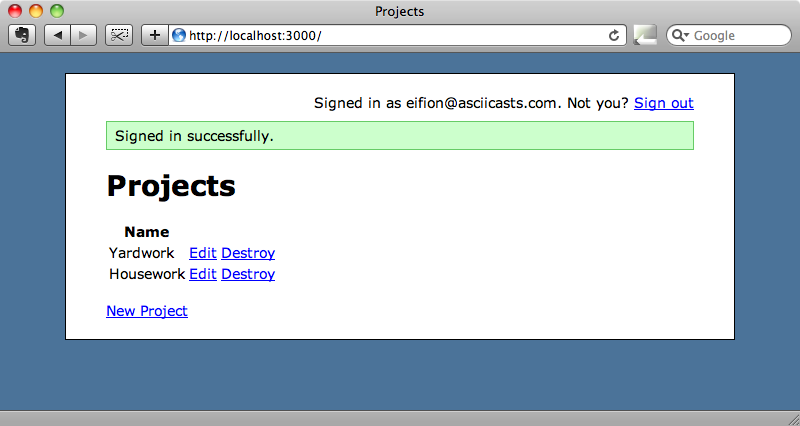
We’ll be working with the episode we wrote in episode 209 which is a simple to-do list application that uses Devise to handle user authentication. The “Sign up” and “Sign in” links take the user to a page where they can log in or sign up by supplying a username and password. We’ll start off by signing in to an existing account as this will make it simple as we develop other types of authentication such as Twitter.
OmniAuth comes as a gem and we’ll can include it in our application in the usual way by modifying the Gemfile.
/Gemfile
source 'http://rubygems.org'
gem 'rails', '3.0.0'
gem 'sqlite3-ruby', :require => 'sqlite3'
gem 'devise', '1.1.3'
gem 'omniauth'
We can then run bundle install (or just bundle) to install the gem and its dependencies. OmniAuth has a number of dependencies but bundler will take care of installing them all.
The next step is to go into the application’s /config/initializers directory and create a new file. We’ll call it omniauth.rb but the name isn’t really important. In this file we’ll add OmniAuth::Builder to our application’s middleware and define the providers that our application will use to authenticate against.
/config/initializers/omniauth.rb
Rails.application.config.middleware.use OmniAuth::Builder do
  provider :twitter, 'CONSUMER_KEY', 'CONSUMER_SECRET'
  provider :facebook, 'APP_ID', 'APP_SECRET'
  provider :linked_in, 'CONSUMER_KEY', 'CONSUMER_SECRET'
end
In this application we’re only going to use Twitter, even though there are many providers we could choose from, so we can remove the other two lines. In order to support authentication through Twitter we’ll need to set up our application with Twitter by visiting their developer site and registering it. The registration form is easy to fill in and once we’ve registered our app we’ll be given the key and secret that we’ll need to paste to the initializer file.
/config/initializers/omniauth.rb
Rails.application.config.middleware.use OmniAuth::Builder do
  provider :twitter, 's3dXXXXXXXXXXXX', 'lR23XXXXXXXXXXXXXXXXXXXX'
end
If we start up our application’s server we’ll already be able see OmniAuth in action. If we visit the URL /auth/twitter we’ll be redirected to Twitter and asked if we want to grant access to this application.
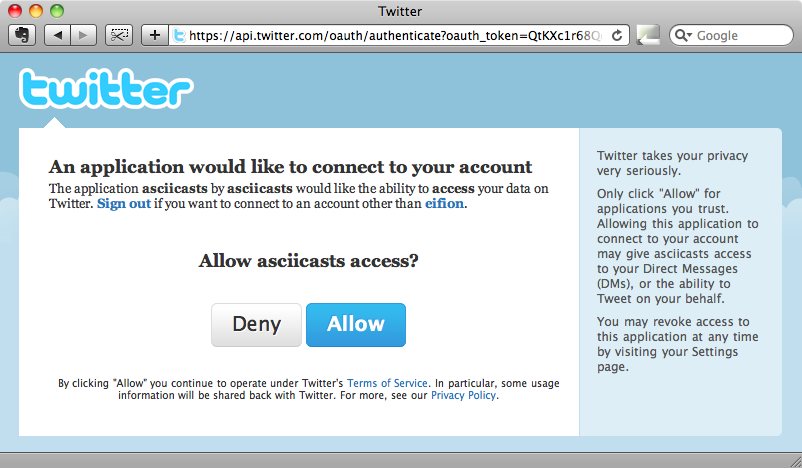
If we click “Allow” we’ll be redirected back to our application with the URL /auth/twitter/callback. Our application needs to handle this URL to deal with what happens after a user has logged in. How we handle this response is entirely up to us and this is what makes OmniAuth so flexible. In this case we’ll create a separate resource to handle the response that we’ll call Authentication.
We could create the model and controller separately but to make things easier we’ll use Ryan Bates’ Nifty Scaffold generator to create the model, view and controller in one go. The Authentication resource will have a user_id column, a provider column that will store the name of the provider, e .g. “Twitter” or “Facebook” and a uid column which will store the provider’s user identifier. For the controller we’ll want index, create and destroy actions.
$ rails g nifty:scaffold authentication user_id:integer
provider:string uid:string index create destroy
When that command completes we’ll need to run the database migration.
$ rake db:migrate
Next we’ll need to set up the relationship between the User and Authentication models. A user will be able to authenticate in a number of different ways so each user will have many authentications.
/app/models/user.rb
class User < ActiveRecord::Base
  has_many :authentications
  # Include default devise modules. Others available are:
  # :token_authenticatable, :lockable, :timeoutable and :activatable
  # :confirmable,
  devise :database_authenticatable, :registerable,
         :recoverable, :rememberable, :trackable, :validatable
  # Setup accessible (or protected) attributes for your model
  attr_accessible :email, :password, :password_confirmation
end
Similarly, an Authentication will belong to a User.
/app/models/authentication.rb
class Authentication < ActiveRecord::Base
  belongs_to :user
end
The scaffold generator also created an AuthenticationsController which we can use to handle the OmniAuth response. We’ll map the response’s URL to the controller’s create action by modifying the routes file.
/config/routes.rb
ProjectManage::Application.routes.draw do |map|
  match '/auth/:provider/callback' => 'authentications#create'
  devise_for :users
  resources :projects
  resources :tasks
  resources :authentications
  root :to => 'projects#index'
end
Notice the colon in the match string. This means that we can match any provider and get it as a parameter.
Inside the create action we can fetch the authentication details to a call to request.env["rack.auth"]. (In future versions of OmniAuth this will be request.env["omniauth.auth"]). For now we’ll just render this out as text so that we can see what information it contains.
/app/controllers/authentication_controller.rb
class AuthenticationsController < ApplicationController
  def index
  end
  def create
    render :text => request.env["rack.auth"].to_yaml
  end
  def destroy
  end
end
If we visit /auth/twitter now and authenticate on the Twitter site we’ll see that we get a large amount of information back.
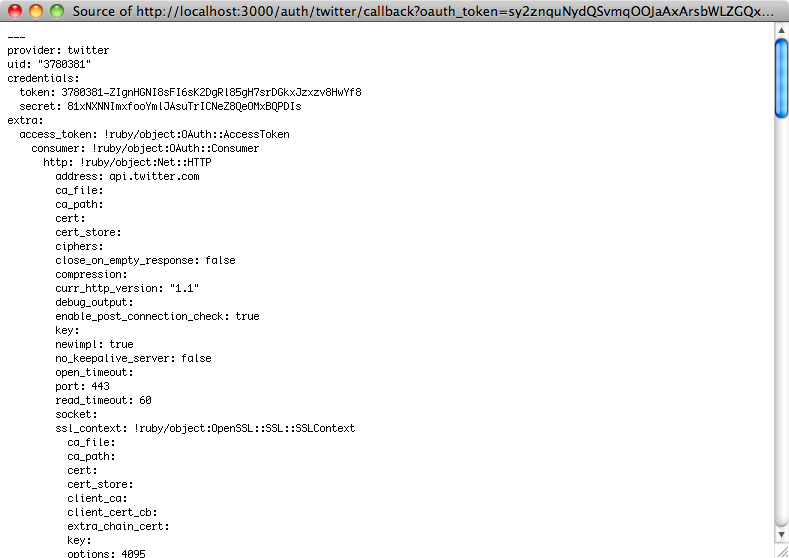
The information returned is a hash of nested hashes. At the top of the list are the provider and uid fields that we’re interested in. We’ll store both the provider name and the uid in our Authentication model. Down at the bottom of the file is some user information that could be useful to store in the User model.
user_info:
  nickname: eifion
  name: Eifion
  location: North Wales
  image: http://a1.twimg.com/profile_images/434158309/Adium_Icon_normal.png
  description: Web developer using .Net and Windows by day and Ruby and Rails on OS X the rest of the time. I run http://asciicasts.com
  urls:
    Website: http://asciicasts.com
Storing The Authentication Information
We’ll need to modify the create action and change its behaviour depending on the user’s current status, but we’ll look at the simplest case first: when a user is currently logged in we just want to add this new authentication to their user account.
/app/controllers/authentications_controller.rb
def create
  auth = request.env["rack.auth"] current_user.authentications.create(:provider => auth ['provider'], :uid => auth['uid'])
  flash[:notice] = "Authentication successful."
  redirect_to authentications_url
end
In the create action we get the authentication information into a hash then create a new Authentication for the user based on two of the parameters from the information returned by the authentication provider. We’ll then create a flash message and redirect back to the index action.
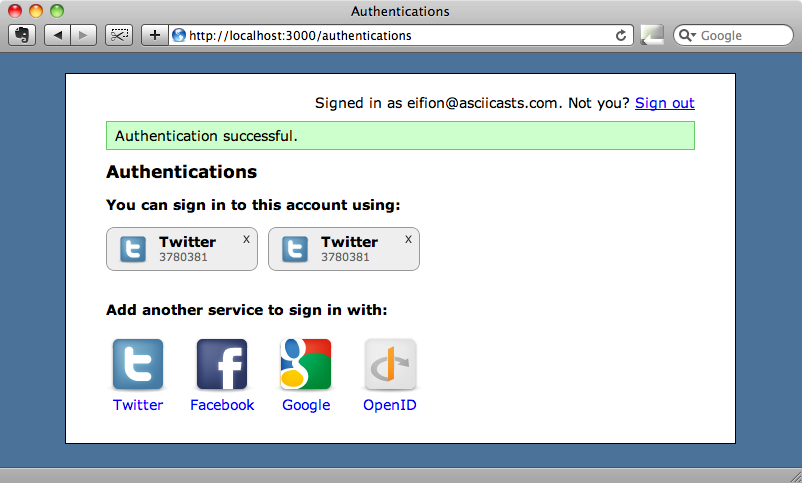
If we visit /auth/twitter and authenticate now we’ll be redirected to the index page where we’ll see the details of the new authentication we just added with the correct provider and uid.

Improving The Look of The Index Page
There’s a really useful GitHub account call Authbuttons that has icons for many different authentication services. We can use these to improve the look of the page where the user chooses the authentication method they use to log in. For convenience we’re going to handle all of this inside the AuthenticationsController’s index action but in a production application you might want do put this in a separate page.
Before we do that, however, we’ll need to make a change to the code in the index action. The code that the scaffolding generated will fetch all of the authentications. We’ll change it so that it only fetches those for the current user.
/app/controllers/authentications_controller.rb
def index
  @authentications = current_user.authentications if current_user
end
Now is also a good time to make a similar change to the destroy action so that it can’t destroy authentications that don’t belong to the current user.
/app/controllers/authentications_controller.rb
def destroy
  @authentication = current_user.authentications.find(params[:id])
  @authentication.destroy
  flash[:notice] = "Successfully destroyed authentication."
  redirect_to authentications_url
end
Next we need to change the view code. There’s quite a lot of it, but nothing complicated.
/app/views/authentications/index.html.erb
<% title "Sign In" %>
<% if @authentications %>
 <% unless @authentications.empty? %>
  <p><strong>You can sign in to this account using:</strong></p>
   <div class="authentications">
    <% for authentication in @authentications %>
     <div class="authentication">
      <%= image_tag "#{authentication.provider}_32.png", ↵
      :size => "32x32" %>
      <div class="provider"><%= authentication.provider.titleize↵
      %></div>
      <div class="uid"><%= authentication.uid %></div>
       <%= link_to "X", authentication, :confirm => ↵
      'Are you sure you want to remove this authentication ↵
      option?', :method => :delete, :class => "remove" %>
     </div>
     <% end %>
     <div class="clear"></div>
    </div>
   <% end %>
   <p><strong>Add another service to sign in with:</strong></p>
  <% else %>
  <p><strong>Sign in through one of these services:</strong></p>
<% end %>
<a href="/auth/twitter" class="auth_provider">
  <%= image_tag "twitter_64.png", :size => "64x64", ↵
  :alt => "Twitter" %>Twitter</a>
<a href="/auth/facebook" class="auth_provider">
  <%= image_tag "facebook_64.png", :size => "64x64", ↵
  :alt => "Facebook" %>Facebook</a>
<a href="/auth/google_apps" class="auth_provider">
  <%= image_tag "google_64.png", :size => "64x64", ↵
  :alt => "Google" %>Google</a>
<a href="/auth/open_id" class="auth_provider">
  <%= image_tag "openid_64.png", :size => "64x64", ↵
  :alt => "OpenID" %>OpenID</a>
<div class="clear"></div>
If we reload the authentications page now it will look quite a lot better.
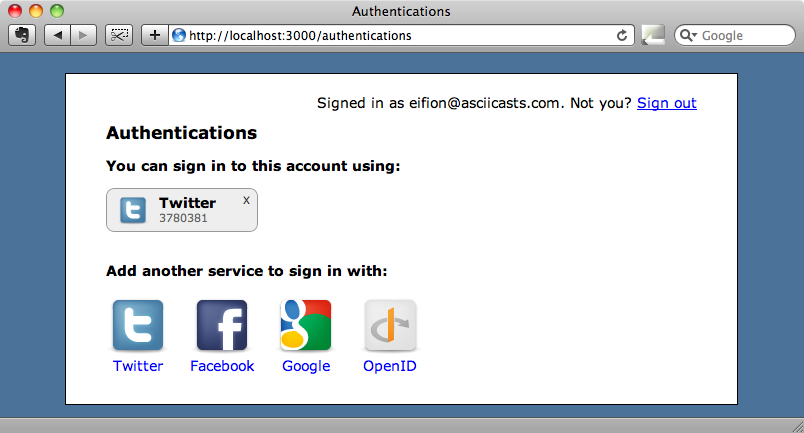
Our application doesn’t currently support all of the services shown above but the screenshot above shows us what it would be like if it did. While this page now looks a lot better it does have a bug in it. If, when we’re logged in and authenticated via Twitter, we try authenticating again a second authentication record is created when it should use the existing one.
This is a fairly easy problem to fix. All we need to do is modify the AuthenticationController’s create action so that it uses find_or_create_by_ to see if there is an existing authentication before creating a new one.
/app/controllers/authentication_controller.rb
def create
  auth = request.env["rack.auth"]
  current_user.authentications.find_or_create_by_provder_and_uid↵
  (auth['provider'], auth['uid'])
  flash[:notice] = "Authentication successful."
  redirect_to authentications_url
end
Now if we remove the second authentication and then authenticate via Twitter again we’ll still only have one authentication against the user.
One major requirement that we haven’t yet tackled is authenticating when the user is not currently signed in. If we look in the create action above we’ll see that the code assumes that we have a current user. So what happens when someone comes to the site for the first time and tries to sign in via Twitter? We’ll cover this problem in the next episode.