
233: Engage With Devise
(view original Railscast)
Other translations:


In the recent Rails Rumble competition participants tried to create a Rails application in 48 hours. The signup page for the competition was interesting, offering a way to sign in through a number of different services.
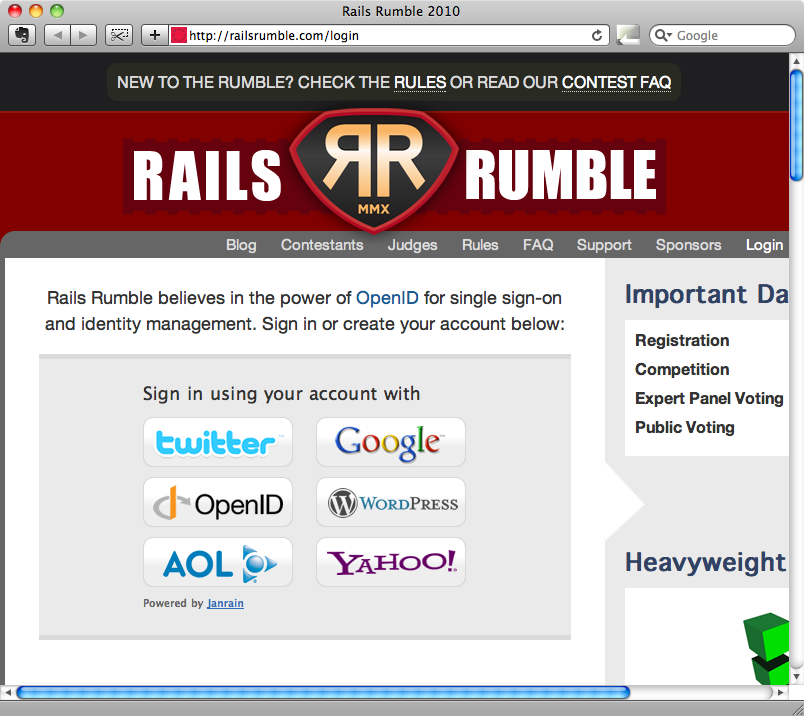
Providing logins via different services can take a lot of work to implement, but the Rails Rumble site solves this by using Janrain who provide a service called Janrain Engage (also known as RPX). This is a central authentication service; one API that an application can communicate with to enable authentication via a large number of other providers. Janrain is a commercial service, but there is a free Basic plan which is perfect for something like a Rails Rumble entry.
Signing Up For Engage
Signing up for the basic Janrain Engage service is simple. Once we’ve signed up and provided a name for our application we’ll be taken to our account’s home page. Here we’ll need to note our API key and the name of the application, in this case ‘asciicasts’. We’ll also need to set up the providers we want to use. If we sign in and then click the ‘Providers’ tab we’ll be taken to a page where we can choose the services our application’s users will be able to sign in with.
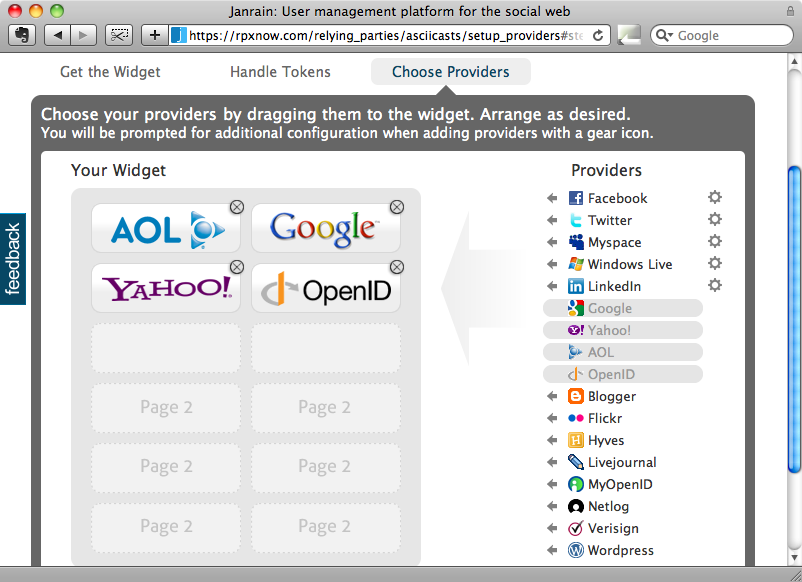
The free plan only allows use to choose six providers but that still gives us plenty of choice. Note that some of them require extra setup. To use Twitter, for example, we’d need to set up our application as an OAuth client, but that’s easy enough to do. For our application we’ll stick with the four providers that are provided by default.
Modifying our Application to use Engage
Now that we’re signed up we can use Engage in a Rails application. If we were creating authentication from scratch we could use the RPXNow gem which offers a lot of functionality to help us use Engage in an application. If our application used Authlogic then there’s an Authlogic RPX gem that is worth investigating. Finally there is the RPX Connectable gem for use with Devise. The application we’re working with in this episode uses Devise so we’ll be using this last gem to embed Engage into it. If you’re not familiar with Devise then take a look at episode 209 [watch, read] for an introduction.
Our application already has “Sign up” and “Sign in” links and these take the user to a simple form that needs to be filled in with an email address and password.
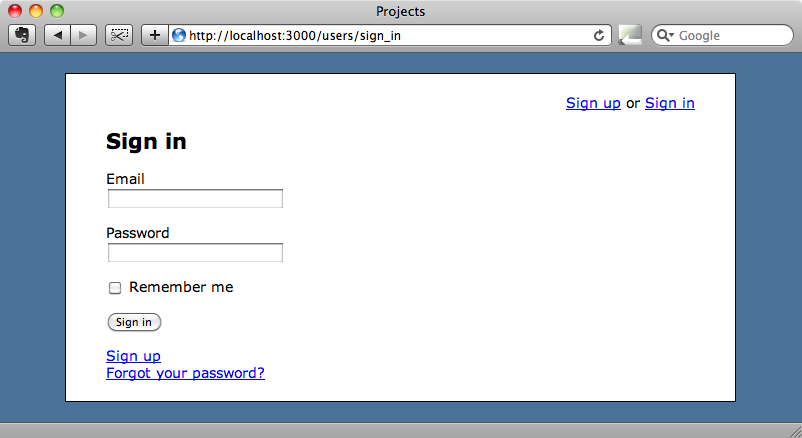
We want to replace these links with a single link that takes the user to a page where they can sign in via Engage and this is where we can make use of the RPX Connectable gem.
To use the gem in our application we just need to add a reference to it the Gemfile.
/Gemfile
source 'http://rubygems.org'
gem 'rails', '3.0.0'
gem 'sqlite3-ruby', '1.2.5', :require => 'sqlite3'
gem 'devise'
gem 'nifty-generators'
gem 'devise_rpx_connectable'
Then install it with
$ bundle install
To use RPX we’ll need to add an rpx_identifier field to our Users table. We’ll generate a new migration to do this.
$ rails g migration add_rpx_to_users rpx_identifier:string
We can then run the migration to add the new field.
$ rake db:migrate
Next we need to modify the call to devise in the User model so that it has :rpx_connectable in its list of modules.
/app/models/user.rb
class User < ActiveRecord::Base
  devise :database_authenticatable, :registerable,
         :recoverable, :rememberable, :trackable, :validatable, :rpx_connectable
  # Setup accessible (or protected) attributes for your model
  attr_accessible :email, :password, :password_confirmation
end
Finally we have to update our application’s Devise config file to specify the name we gave the application when we signed up for Engage, along with the API key we were given.
/config/initializers/devise.rb
Devise.setup do |config|
  # Configure the e-mail address which will be shown in DeviseMailer.
  config.mailer_sender = "test@example.com"
  config.rpx_application_name = 'asciicasts'
  RPXNow.api_key = "aaabbbcccdddeeefff" # real key goes here.
end
Now that we have everything set up we can replace our application’s “Sign up” and “Sign in” links in the layout file with a link to the Engage signup page, passing in the URL we want to return to after signing in.
/app/views/layouts/application.html.erb
<%= link_to_rpx "Sign in", user_session_url %>
Logging In
We now have the code in place to try logging in. When we click the “Sign in” link on our application we’ll now be taken to a page on Janrain’s server.
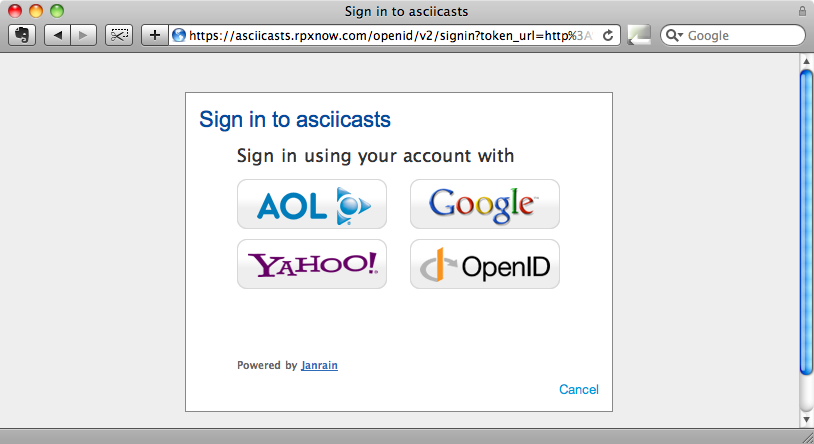
We can now sign in using one of the accounts above and, assuming we enter our details correctly we’ll be redirected back to our application.
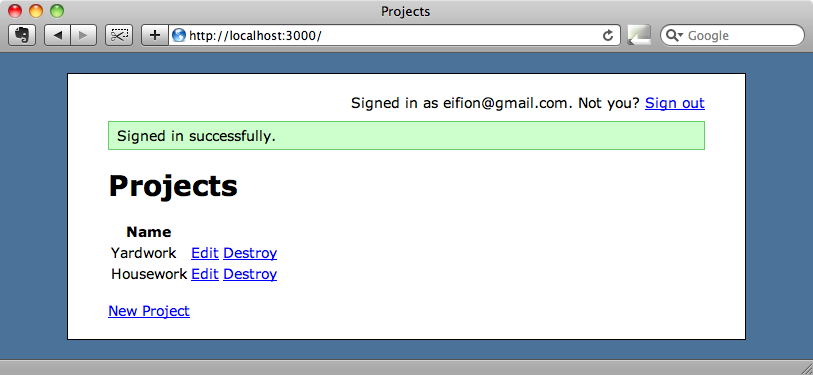
Note that we’re now signed in to the application.
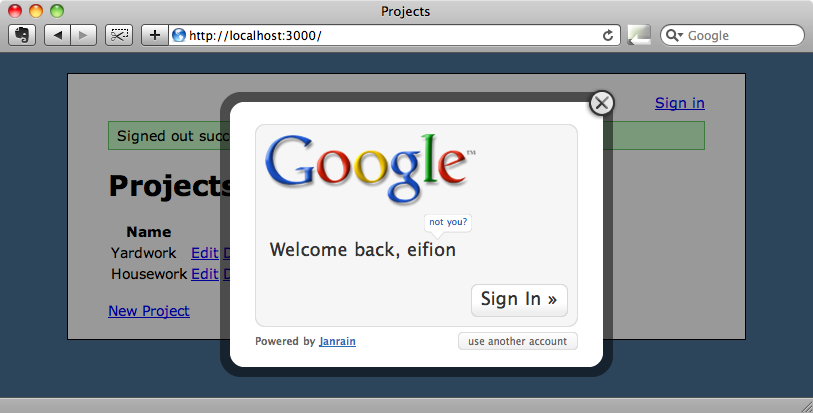
A Better Login Page
If we want the sign-in panel to be a cool JavaScript overlay instead of a separate page we can do so by including the following line of code just before the closing body tag on the layout page.
/app/views/layouts/application.html.erb
<%= javascript_include_rpx(user_session_url) %>
This will add some JavaScript to our application that shows an overlay on the site when a user tries to log in.
Alternatively we could embed the sign-in panel anywhere in our application by using an iframe. To do this all we need to do is to add the following line of code somewhere in the view code.
<%= embed_rpx user_session_url %>
This code is best placed somewhere near the sign up or login forms to provide an alternative way to log in.
Everything we’ve shown you in this episode is in the Devise RPX Connectable README file, along with some information about additional options that can be passed in so that we can request additional information about each logged-in user.