
209: Introducing Devise
(view original Railscast)
Other translations:


We’ve covered several authentication solutions over the course of these episodes and today we’re going to show you another. This one is called “devise” and has been gaining in popularity recently. Devise is based on Warden, a Rack-based authentication solution, and uses it under the bonnet. You won’t need to know anything about Warden to follow this episode though as we’re going to be dealing with devise directly.
Devise handles authentication across the entire stack. It you’re familiar with Authlogic which was covered back in episode 160 [watch, read] you’ll know that it covers just the model layer. By comparison, devise is a Rails Engine and covers controllers and views as well. Devise is modular and currently consists of eleven modules, each of which provides a different aspect of authentication. For example one module, Rememberable, remembers the user’s authentication in a saved cookie while another, Recoverable, looks after resetting the user’s password and sending reset instructions. This approach makes it easy to choose which parts of the authentication you want to use in your applications.
Adding Authentication to an Application
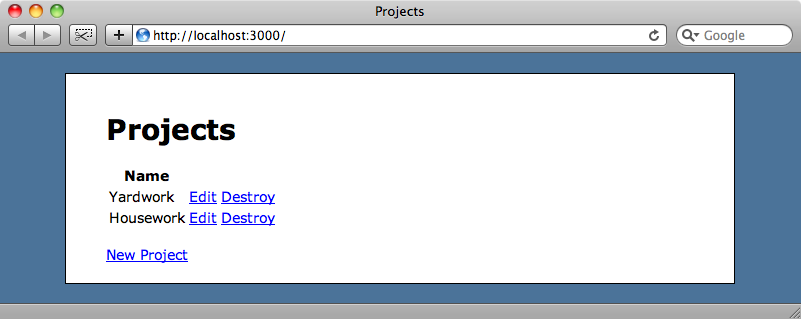
Let’s take a look at what’s required to get devise working in an application. Below is a screenshot from a simple project management application, written in Rails 3.0 and we’re going to use devise to add a User model and some authentication to it.
Devise works well with Rails 3 but there are some specific installation instructions that must be followed to get the correct version. For Rails 3 applications the latest version, currently 1.1.rc0, should be installed. If you want to use devise with a Rails 2.3 app then you’ll need version 1.0.6 as version 1.1 is not backwards-compatible with Rails 2.
We’re working with a Rails 3 application so we’ll add a reference to devise in our application’s Gemfile, making sure to specify the correct version.
/Gemfile
gem 'devise', '1.1.rc0'
Once we’ve done that we’ll run bundle to install the gem and its dependencies.
bundle install
The next step is to run the installation generator.
$ rails generate devise_install
      create  config/initializers/devise.rb
      create  config/locales/devise.en.yml
===============================================================================
Some setup you must do manually if you haven't yet:
  1. Setup default url options for your specific environment. Here is an
     example of development environment:
       config.action_mailer.default_url_options = { :host => 'localhost:3000' }
     This is a required Rails configuration. In production is must be the
     actual host of your application
  2. Ensure you have defined root_url to *something* in your config/routes.rb.
     For example:
       root :to => "home#index"
===============================================================================
This command generates a couple of files, an initializer and a locale file that contains all of the messages that devise needs to display. Below that it lists two manual setup steps that must be performed. The first is to set the host option for the application’s mailer, while the second says that we must have a root route. Our application already has a root route so we don’t need to do anything there, but we do need to set up our mailer’s configuration. We can do this by copying the line from the instructions above in to the block in the development environment file.
/config/environments/development.rb
config.action_mailer.default_url_options = { :host => 'localhost:3000' }
This line sets the host option to localhost. If this application was going into production then we’d want to set this value to our domain name in the equivalent production.rb file.
Creating a devise User Model
We’re going to need a User model to handle authentication and devise provides a generator for doing just that. It’s not necessary to use it but doing so saves us a few steps when setting up devise.
$ rails generate devise User
      invoke  active_record
      create    app/models/user.rb
      invoke    test_unit
      create      test/unit/user_test.rb
      create      test/fixtures/users.yml
      inject  app/models/user.rb
      create  db/migrate/20100412200407_devise_create_users.rb
       route  devise_for :users
This generator creates a few interesting things: a model file, a migration and a devise_for route. We’ll take a look at each of these now.
The generated model file looks like this:
/app/models/user.rb
class User < ActiveRecord::Base
  # Include default devise modules. Others available are:
  # :token_authenticatable, :lockable, :timeoutable and :activatable
  # :confirmable
  devise :database_authenticatable, :registerable,
         :recoverable, :rememberable, :trackable, :validatable
  # Setup accessible (or protected) attributes for your model
  attr_accessible :email, :password, :password_confirmation
end
The User model is much like any other ActiveRecord model but it has a call to a devise method, which is here the authentication magic happens. The devise method takes as arguments a list of the modules we want to support in our application and you should recognize :rememberable and :recoverable from when we mentioned them earlier. We can easily add or remove modules from this list to customize devise’s authentication to our application’s needs. To that end we’ve removed :confirmable as we don’t want users to have to confirm that they’ve signed up via email.
Note that the User class also has a attr_accessible method which lists the attributes that the user can modify via the user interface. If we have custom columns in our model then we can add them here.
Next we’ll turn to the generated migration file.
class DeviseCreateUsers < ActiveRecord::Migration
  def self.up
    create_table(:users) do |t|
      t.database_authenticatable :null => false
      # t.confirmable
      t.recoverable
      t.rememberable
      t.trackable
      # t.lockable :lock_strategy => :failed_attempts, :unlock_strategy => :both
      t.timestamps
    end
    add_index :users, :email,                :unique => true
    # add_index :users, :confirmation_token,   :unique => true
    add_index :users, :reset_password_token, :unique => true
    # add_index :users, :unlock_token,         :unique => true
  end
  def self.down
    drop_table :users
  end
end
This file is fairly easy to understand as there’s a separate method call on the table to create the required columns for each module. As we don’t want to use the confirmable module we have commented the relevant method out. We also have to remove the related index for the confirmation token as that column won’t exist in our database table.
Now that we’ve modified the migration to suit the modules we want to use we can run the database migration.
rake db:migrate
Finally we have the devise_for route that was added to the routes file for us. If we run rake routes we can see the routes that this line of code creates.
    new_user_session   GET    /users/sign_in                 {:controller=>"devise/sessions", :action=>"new"}
          user_session POST   /users/sign_in                 {:controller=>"devise/sessions", :action=>"create"}
  destroy_user_session GET    /users/sign_out                {:controller=>"devise/sessions", :action=>"destroy"}
                       POST   /users/password(.:format)      {:controller=>"devise/passwords", :action=>"create"}
         user_password PUT    /users/password(.:format)      {:controller=>"devise/passwords", :action=>"update"}
     new_user_password GET    /users/password/new(.:format)  {:controller=>"devise/passwords", :action=>"new"}
    edit_user_password GET    /users/password/edit(.:format) {:controller=>"devise/passwords", :action=>"edit"}
                       POST   /users(.:format)               {:controller=>"devise/registrations", :action=>"create"}
                       PUT    /users(.:format)               {:controller=>"devise/registrations", :action=>"update"}
     user_registration DELETE /users(.:format)               {:controller=>"devise/registrations", :action=>"destroy"}
 new_user_registration GET    /users/sign_up(.:format)       {:controller=>"devise/registrations", :action=>"new"}
edit_user_registration GET    /users/edit(.:format)          {:controller=>"devise/registrations", :action=>"edit"}
This is a little difficult to read but we can see that there are several authentication routes including routes for signing in and out, resetting passwords, signing up as a new user and resetting a profile. These routes are all customizable should we want to change them.
We can now access our authentication through these routes. If we go to /users/sign_up we’ll see the form for signing up as a new user.
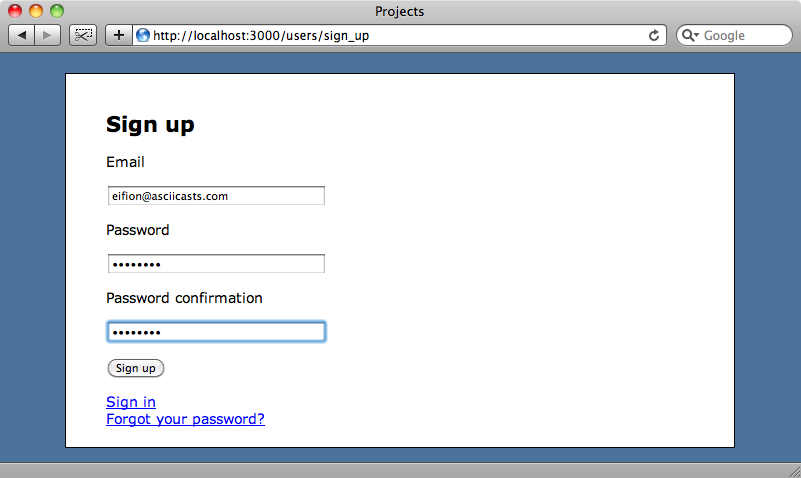
If we fill in the form and click “Sign up” we’ll be signed up and signed in. Once we have signed in we can sign out by visiting /users/sign_out, but when we try to sign in again by visiting /users/sign_in and filling in the form with the username and password we supplied when we signed up we’ll see an error.
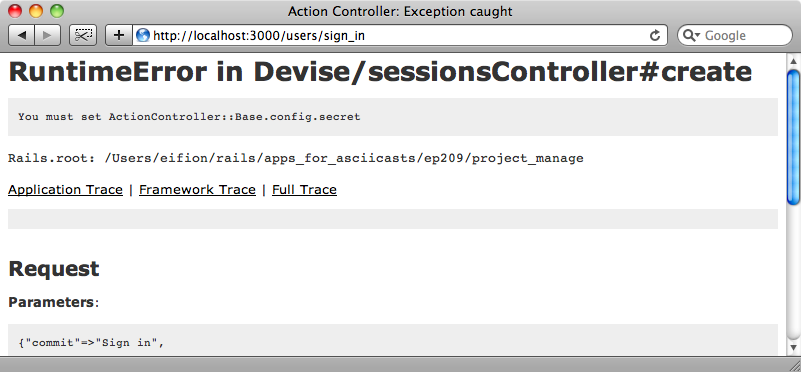
This is caused by a problem with Rails 3.0 beta 2 and is not specific to devise. If do you see this error then fortunately it’s easy to fix. In the file /config/initializers/cookie_verification_secret.rb is a line of code that sets the secret key for verifying signed cookies.
/config/initalizers/cookie_verification_secret.rb
# Be sure to restart your server when you modify this file.
# Your secret key for verifying the integrity of signed cookies.
# If you change this key, all old signed cookies will become invalid!
# Make sure the secret is at least 30 characters and all random,
# no regular words or you'll be exposed to dictionary attacks.
Rails.application.config.cookie_secret = '3b161f7668f938d1aeb73e1137964f8d5ebaf32b9173c2130ecb73b95b610702b77370640dce7e76700fb228f35f7865ab2a5ccd22d00563504a2ea9c3d8dffe'
All we need to do is remove this line from here into /config/application.rb, removing the Rails.application section from the start.
/config/application.rb
require File.expand_path('../boot', __FILE__)
require 'rails/all'
Bundler.require(:default, Rails.env) if defined?(Bundler)
module ProjectManage
  class Application < Rails::Application
    config.filter_parameters << :password
    config.cookie_secret = '3b161f7668f938d1aeb73e1137964f8d5ebaf32b9173c2130ecb73b95b610702b77370640dce7e76700fb228f35f7865ab2a5ccd22d00563504a2ea9c3d8dffe'
  end
end
We’ll need to reboot the server for this change to take effect, but once we have we should be able to sign in successfully.

Now we have a fully-functioning authentication setup we can start to improve it. It would be good if we could have a link at the top of the page to tell us if we’re currently logged in and one to allow us to sign out if we are or to sign in if not.
We can do this by modifying the application’s layout file so that the links are visible on every page. Just before the code that displays the flash messages we’ll add the following lines:
/app/views/layouts/application.html.erb
<div id="user_nav">
  <% if user_signed_in? %>
    Signed in as <%= current_user.email %>. Not you?
    <%= link_to "Sign out", destroy_user_session_path %>
  <% else %>
    <%= link_to "Sign up", new_user_registration_path %> or
    <%= link_to "Sign in", new_user_session_path %>
  <% end %>
</div>
In the code we have an if/else statement so that we can display a different message dependent on whether the person viewing the site is signed in or not. We can determine this by calling user_signed_in? which is a method that is supplied by devise and which will return true if the current user is signed in. If there is a currently logged-in user we’ll show the email address they’re logged in with and a link to log them out. We can display the email address by calling current_user to get the User object for the current user and displaying the email property. To get the right path for the “sign out” link we can look back in the list of routes we generated before with rake routes. Among the routes listed here are destroy_user_session which maps to /users/sign_out and so we can use destroy_user_session_path to generate the correct URL for the link.
Similarly we can use the new_user_registration_path and new_user_session_path to create the links for signing up or signing in. With these in place we can reload the page and we’ll see the user’s information at the top of the page.
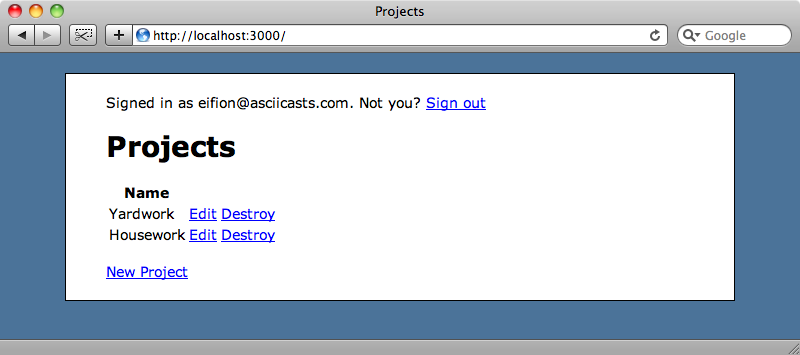
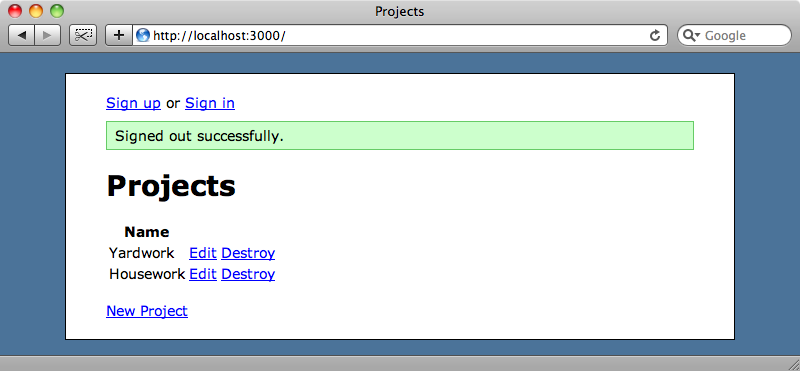
If we click the “sign out” link we’ll see the “Sign up” and “Sign in” links instead.
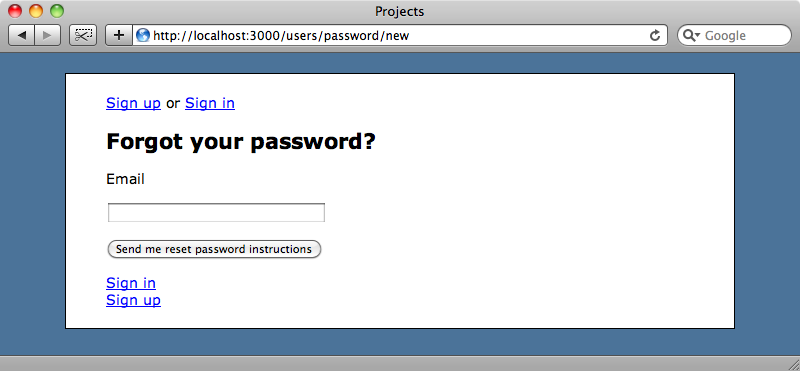
As you can see it’s pretty easy to get a full authentication setup by using devise. With just a little work we have the functionality to sign up new users and to allow them to sign in and out. There are also other parts we’ve not yet discussed, for example the reset password page. If we’d kept in the confirmable model then devise would have created a form for us and generated the related logic as well.
While it’s great to have all of these forms created for us we’ll probably want to customize them to fit the appearance of our applications. Fortunately devise makes that easy and we’ll cover that in the next episode.