
201: Bundler
(view original Railscast)
Other translations:


In this episode we’ll continue our look at the new features of Rails 3. This time we’re going to take a look at bundler which is the new way to manage gem dependencies in Rails applications.
Bundler is currently being updated fairly often so before doing anything with it it’s worth making sure that you have the latest version by running
gem install bundler
Note that we’re not using sudo when we install the gem because we’re using a version of Ruby that we installed with rvm.
Using Bunder to Install Gems
In the previous episode when we tried to start up the web server for the application it complained about a missing sqlite3-ruby gem. We resolved this by manually installing the gem with gem install.
gem install sqlite3-ruby
We could instead do this through bundler as sqlite3-ruby is a bundler dependency for our application, i.e. it is listed in the application’s Gemfile. To do that we run bundle install which will go through the application’s gem dependencies and install them.
$ bundle install
Fetching source index from http://gemcutter.org
Resolving dependencies
Installing abstract (1.0.0) from system gems
Installing actionmailer (3.0.0.beta) from system gems
Installing actionpack (3.0.0.beta) from system gems
Installing activemodel (3.0.0.beta) from system gems
Installing activerecord (3.0.0.beta) from system gems
Installing activeresource (3.0.0.beta) from system gems
Installing activesupport (3.0.0.beta) from system gems
Installing arel (0.2.1) from rubygems repository at http://gemcutter.org
Installing builder (2.1.2) from system gems
Installing bundler (0.9.5) from system gems
Installing erubis (2.6.5) from system gems
Installing i18n (0.3.3) from system gems
Installing mail (2.1.2) from system gems
Installing memcache-client (1.7.8) from system gems
Installing mime-types (1.16) from system gems
Installing rack (1.1.0) from system gems
Installing rack-mount (0.4.7) from rubygems repository at http://gemcutter.org
Installing rack-test (0.5.3) from system gems
Installing rails (3.0.0.beta) from system gems
Installing railties (3.0.0.beta) from system gems
Installing rake (0.8.7) from system gems
Installing sqlite3-ruby (1.2.5) from system gems
Installing text-format (1.0.0) from system gems
Installing text-hyphen (1.0.0) from system gems
Installing thor (0.13.1) from rubygems repository at http://gemcutter.org
Installing tzinfo (0.3.16) from system gems
Your bundle is complete!
We can see from the output above that bundler has installed all of the gems that the application needs, including sqlite3-ruby. Had it not been already installed then bundler would have downloaded it from Gemcutter and installed it.
So, when in doubt, run bundle install. You should do this whenever you create a new Rails application or clone someone else’s application so that you ensure that you have the correct gems installed. You should also run it when you deploy an application so that the correct gems are installed on the server. You can even add it to your deployment recipe so that it always runs whenever your application is deployed.
One important thing to note is that you should never run sudo when running bundle install, even if you usually use sudo when installing gems.
Adding Gem Dependencies
Now that we know how to manage our gems how do we install and add new gem dependencies to our application? In earlier version of Rails we’d manage these in our application’s /config/environment.rb file, but in Rails 3 gem configuration belongs in a file called Gemfile in the application’s root directory. The default Gemfile looks like this:
# Edit this Gemfile to bundle your application's dependencies.
source 'http://gemcutter.org'
gem "rails", "3.0.0.beta"
## Bundle edge rails:
# gem "rails", :git => "git://github.com/rails/rails.git"
# ActiveRecord requires a database adapter. By default,
# Rails has selected sqlite3.
gem "sqlite3-ruby", :require => "sqlite3"
## Bundle the gems you use:
# gem "bj"
# gem "hpricot", "0.6"
# gem "sqlite3-ruby", :require => "sqlite3"
# gem "aws-s3", :require => "aws/s3"
## Bundle gems used only in certain environments:
# gem "rspec", :group => :test
# group :test do
#   gem "webrat"
# end
There are a couple of gems already included in the file, including rails and sqlite3-ruby. Note that the line that references the rails gem includes a version number. With any gem reference in this file we can specify a version number so that we can include a certain version of a gem. If we want to upgrade the Rails version at some point we can change the version here rather than in the environment.rb file.
If we want to use any additional gems in our application we can just add them to this file. For example, if we want to use will_paginate we can reference it like this:
gem "will_paginate", ">=2.3.12"
The second parameter is a version number and used here it will mean that bundler will install version 2.3.12 or any newer version that it finds. Once we’ve added the gem reference we can install it with bundle install, but before we do that we’ll demonstrate another bundle command: bundle check.
We can run bundle check to list the gems that our application depends on but which aren’t installed. If we run it for our application it will show that will_paginate gem that we’ve referenced but not yet installed.
$ bundle check
The following dependencies are missing
  * will_paginate (>= 2.3.12, runtime)We can install the missing gems by running bundle install again.
To see what other bundle commands are available we can run bundle help.
$ bundle help
Tasks:
  bundle check        # Checks if the dependencies listed in Gemfile are satisfied by currently installed gems
  bundle exec         # Run the command in context of the bundle
  bundle help [TASK]  # Describe available tasks or one specific task
  bundle init         # Generates a Gemfile into the current working directory
  bundle install      # Install the current environment to the system
  bundle lock         # Locks the bundle to the current set of dependencies, including all child dependencies.
  bundle pack         # Packs all the gems to vendor/cache
  bundle show         # Shows all gems that are part of the bundle.
  bundle unlock       # Unlock the bundle. This allows gem versions to be changed
Other Gemfile Options
We’ll go back to our Gemfile now to see what else we can do in it. One cool new feature is the ability to get a gem from a Git repository. For example, if we want to live of the edge and use the latest version of Rails in our application we can point the Rails gem to its Git repository.
# Bundle edge rails:
gem "rails", :git => "git://github.com/rails/rails.git"
This is a powerful feature to have. If a gem doesn’t quite work as we want it to we can fork the project on Github, modify the code to suit and then point the gem dependency to point to our version.
We can also restrict gems to a certain environment. If we want to use RSpec for testing we can pass in a :group option to restrict it to the test environment.
gem "rspec", :group => :test
Alternatively, if we have a number of gems we want to restrict to one environment we can use group and pass it a block.
group :test do
  gem "webrat"
  get "rspec"
end
If we run bundle install now it will install all of the gems we’ve specified for each environment.
$ bundle install
Fetching source index from http://gemcutter.org
Resolving dependencies
...
Installing rspec (1.3.0) from rubygems repository at http://gemcutter.org
...
Installing webrat (0.7.0) from rubygems repository at http://gemcutter.org
Installing will_paginate (2.3.12) from system gems
Your bundle is complete!
As you’ll see from the (truncated) output above we can see that that two gems we specified in our Gemfile have been installed.
If we want to install gems but exclude those from a certain environment we can use the --without option. To install the gems that aren’t in the test group we can run:
bundle install --without=test
This is useful when you’re installing your application on your production server and don’t want to install the gems that are only used in the test environment.
Locking Gems
Another useful command is bundle lock. This locks down the specific versions of the gems your application is using. After we run it our project will have a new file in it called Gemfile.lock. This file lists all of the gems that are installed for our application along with specific version that is used. After running bundle lock only the specific versions listed in the Gemfile.lock file will be installed when we run bundle install, even if there are never versions available.
You might be wondering when you’d want to use bundle lock. Well, it’s worth using whenever a project is used in other locations. If we’re working with other Rails developers on a project we can use bundle lock to ensure that everyone is using the same versions of the gems that the application uses. The same applies when the application is being deployed to production. As the application will be being deployed to a different server we’ll want to be sure that exactly the same versions are used on the production server as they are on our development machine.
If we do need to make changes to an application’s gems after running bundle lock we shouldn’t change the Gemfile.lock file directly. Instead we should update the Gemfile as we did before. Once we’ve made our changes to the Gemfile, however, running bundle install won’t update the application’s gems as the Gemfile is locked. To update the gems we need to pass the --relock option.
bundle install --relock
This will unlock the Gemfile, update the gems and then re-lock.
Packing Gems With An Application
That pretty much covers the basic bundler workflow and is enough to cover most of what you’ll need when working with bundler in your applications. One final bundler feature we’ll cover is bundle pack.
Bundler installs the gems in a .bundle directory under our home directory.
$ ls ~/.bundle
cache		doc		gems		ruby		specifications
This means that the gems aren’t bundled with our application and aren’t included in our project’s version control system. If we want to store the gems within our application we can run bundle pack.
bundle pack
Copying .gem files into vendor/cache
  * memcache-client-1.7.8.gem
  * rspec-1.3.0.gem
  * thor-0.13.3.gem
  * tzinfo-0.3.16.gem
  * builder-2.1.2.gem
  * nokogiri-1.4.1.gem
  * mime-types-1.16.gem
  * sqlite3-ruby-1.2.5.gem
  * i18n-0.3.3.gem
  * abstract-1.0.0.gem
  * erubis-2.6.5.gem
  * text-hyphen-1.0.0.gem
  * bundler-0.9.6.gem
  * rake-0.8.7.gem
  * will_paginate-2.3.12.gem
  * text-format-1.0.0.gem
  * rack-1.1.0.gem
  * rack-test-0.5.3.gem
  * webrat-0.7.0.gem
  * rack-mount-0.4.7.gem
  * activesupport-3.0.0.beta.gem
  * mail-2.1.2.gem
  * arel-0.2.1.gem
  * activemodel-3.0.0.beta.gem
  * actionpack-3.0.0.beta.gem
  * actionmailer-3.0.0.beta.gem
  * activerecord-3.0.0.beta.gem
  * activeresource-3.0.0.beta.gem
  * railties-3.0.0.beta.gem
  * rails-3.0.0.beta.gem
This will generate the .gem files that our application needs and copy them to its /vendor/cache directory, creating the directory if necessary. The gems will now be installed directly from these .gem files instead of being fetched remotely from, for example, Gemcutter.
This shouldn’t be something you’ll need very often but if you’re in a situation where you don’t want your production server to connect to Gemcutter to download the gems from there then this is a good way to go.
That’s it for this episode. I hope it gave you a good overview on how to use bundler to manage the gems in your applications. Bundler may take a little getting used to but in the long run it will save you from some of the problems that you may have had with gem dependencies in the past.
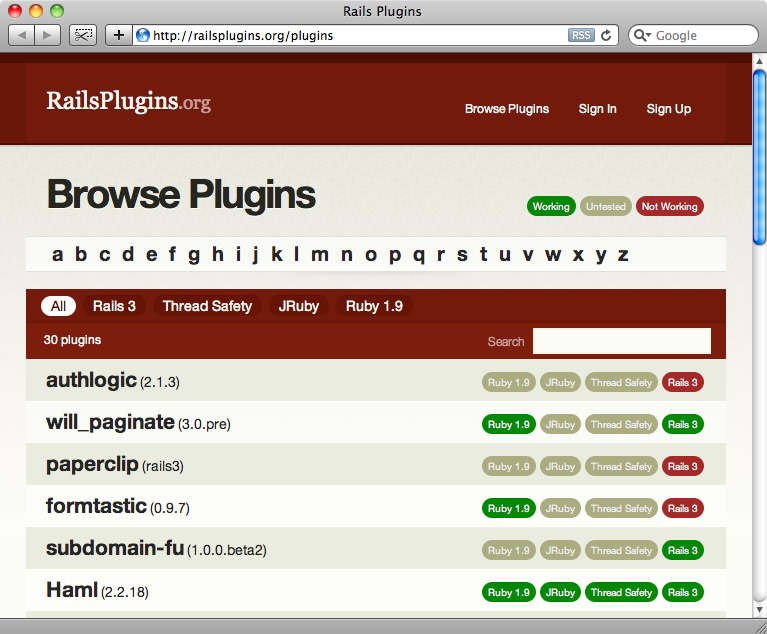
We’ll finish by encouraging you to visit railsplugins.org. You’re probably wondering which gems and plugins work with Rails 3 and this is the place to find out. On the site you can browse the plugins and see if they work with Rails 3 and Ruby 1.9.
If a gem you want to use in a Rails 3 application is listed as not working or untested then this is a great opportunity to raise issues or help to fix it. This way you can help to get involved in getting as many gems and plugins working with Rails 3.