
171: Delayed Job
(view original Railscast)
Other translations:

From episode 127, a short series of episodes showed how to run tasks in a background process. That series missed one of the best ways to do this: the delayed_job plugin by tobi. The plugin was extracted from Shopify and is a robust, stable solution for running background tasks in Rails applications. It’s used by sites as popular as Github, so scales well too.
To demonstrate it we’ll use the example of a mailing application that allows you to create emails sent out to a large list of recipients. Clicking the “deliver” link for a mailing will deliver the emails, but will do it in the current request which takes a while to run and ties up a Rails process while it does so. Our mailing code takes about ten seconds to deliver a mailing which is too long for a user to have to wait for a response to clicking a link.
Long-running tasks like this are always best moved into a background process so we’ll use delayed_job to do just that for our delivery task.
Using The Right Fork And Getting Set Up
The official release of delayed_job can be found on tobi’s Github pages, but there are a number of forks and we’re going to use one supplied by collectiveidea. This fork is a little more feature complete and up to date and also provides a generator script for creating the database table that delayed_job needs.
We’ll begin by installing the plugin in our application with the following command.
script/plugin install git://github.com/collectiveidea/delayed_job.git
And, once it’s installed, run the generator script to create the migration. (Remember that only the collectiveidea fork provides this.)
script/generate delayed_job
  create  script/delayed_job
  exists  db/migrate
  create  db/migrate/20090720195941_create_delayed_jobs.rb
Followed by
rake db:migrate
to generate the new delayed_jobs database table.
Next we’ll start up the jobs process. There are a couple of ways to do this. If we were putting the app into production we would use the delayed_job script that was created when we ran the generator above. This daemonizes the job process and allows multiple background processes to be spawned. As we’re in development we’ll use the provided rake task instead.
rake jobs:work
This will run until we stop it with CTRL+C, which makes it ideal for using while in development mode.
Using delayed_job To Handle Our Mailings
Now that we’ve got delayed_job up and running we can modify our app to move the code that delivers the emails into a background task. The code that kicks off the delivery is the deliver method in the MailingsController.
def deliver
  mailing = Mailing.find(params[:id])
  mailing.deliver
  flash[:notice] = "Mailing delivered"
  redirect_to mailings_url
end
In the controller’s deliver method we find the mailing we want to send then call deliver on it and it’s the Mailing’s deliver method that takes time to run and which should be moved to the background. To do this we’ll try the send_later method. This method can be called on any model and takes as an argument a symbol representing the method we want to call.
mailing.send_later(:deliver)
If there are arguments that we want to pass we can add them to send_later’s argument list. This works like Ruby’s send method, but send_later will move the task into the queue for processing in the background. We’ll update our controller’s deliver method to use send_later and see how it works. Note that we’ve also updated the flash notice to show a more appropriate message.
def deliver
  mailing = Mailing.find(params[:id])
  mailing.send_later(:deliver)
  flash[:notice] = "Mailing is being delivered."
  redirect_to mailings_url
end
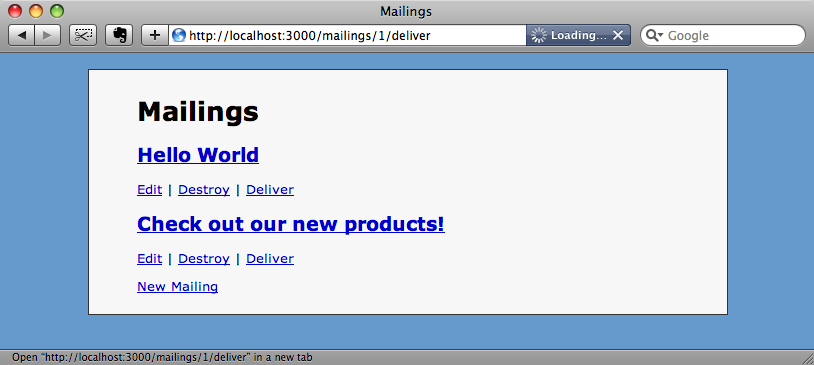
Now, when we click on the “deliver” link for the second mailing in the list we see a response almost immediately.
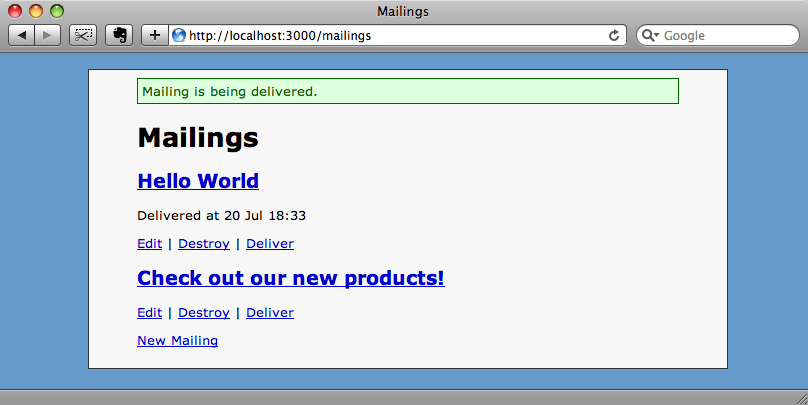
And when we refresh the page a few seconds later it now tells us that our second mailing has been delivered.
If we look at the terminal window we have the rake jobs:work task running in we’ll see when the job has been processed and if it was successful.
1 jobs processed at 0.0993 j/s, 0 failed ...
Creating a Custom Class
The send_later method makes it easy to call a method to run in the background, but what if we want to do more than just call a single method? We can instead create a class for the background code. To demonstrate this we’ll create a class called MailingJob that will live in a file called mailing_job.rb in our application’s /lib folder. Here is the code for that class.
class MailingJob < Struct.new(:mailing_id)
  def perform
    mailing = Mailing.find(mailing_id)
    mailing.deliver
  end
end
One thing to note about this class is that it must have a method called perform which takes no arguments. This makes things a little difficult for us as we need to pass in the mailing_id for the mailing that we want to deliver. We could add an instance variable called @mailing_id to the class along with an initialize method that takes the mailing_id as a parameter, but the convention when using delayed_job is to have our class inherit from a struct. Having a struct as our class’s superclass allows to to define the attributes we want the class to have, in our case a mailing_id. The mailing_id will now be the first parameter when we initialize a MailingJob. This nicely sets us up with a mailing_id variable in the class without having to create an instance variable or an initialize method.
Now that we’ve created our class we can use it on our MailingsController.
def deliver
  Delayed::Job.enqueue(MailingJob.new(params[:id]))
  flash[:notice] = "Mailing is being delivered."
  redirect_to mailings_url
end
The first line in the method does all of the work, creating an instance of our MailingJob class with the correct id for the mailing we want to send and then passing that instance to Delayed::Job.enqueue where it will be queued for processing.
Using a custom class also allows us to take advantage of some of delayed_job’s features by passing additional parameters to the Delayed::Job.enqueue method. The first additional parameter we can pass is a priority. This parameter has a default value of zero, so if we pass a higher value, say, three, then that job will be processed before those jobs with the default value.
Delayed::Job.enqueue(MailingJob.new(params[:id]), 3)
Likewise, passing a priority of less than zero will mean that the job won’t be processed until those with a higher priority have been processed.
Delayed::Job.enqueue(MailingJob.new(params[:id]), -3)
The second parameter than can be passed is a time at which the job should start.
Delayed::Job.enqueue(MailingJob.new(params[:id]), 3, 3.days.from_now)
The job above now won’t be considered to be in the queue for three days after it was added.
Automatic Retry
One final feature of delayed_job worth mentioning is the automatic retry on failure. If a method throws an exception it will be caught and the method rerun later. The method will be retried up to 25 times at increasingly longer intervals until it passes. Care needs to be taken with this especially if, as were are here, you’re sending out mailings. If the mailing fails halfway through we’d need to make sure that when it started again it doesn’t start again from the beginning of the list.
That’s it for our coverage of delayed_job. As we’ve seen it’s a fairly full-featured plugin and one of the best ways to create background tasks in Rails applications. One final tip: it’s worth looking in the recipes folder of the plugin where you’ll find Capistrano recipies for managing delayed_job when you deploy your application.