
149: Rails Engines
(view original Railscast)
Other translations:

A Rails Engine is a method for embedding one Rails application into another. Engines have been available as a plugin for a while, but much of the same functionality is now built in to Rails 2.3. We’ll show you how it works in this episode.
We’ll start off with two separate applications. One is a simple e-commerce application that sells products.
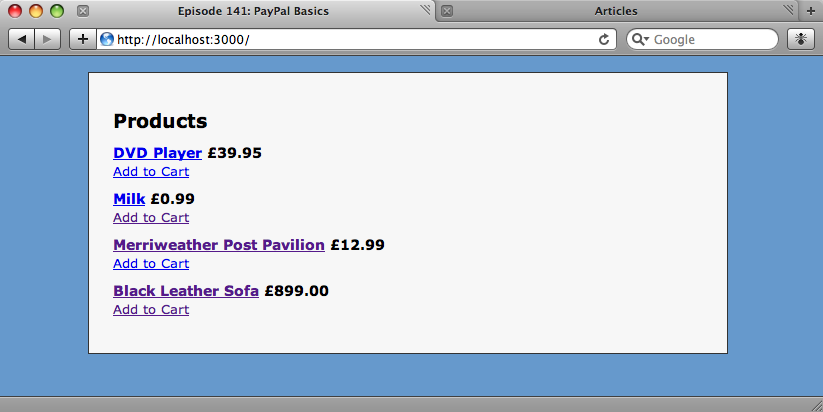
Our shop application running on port 3000.
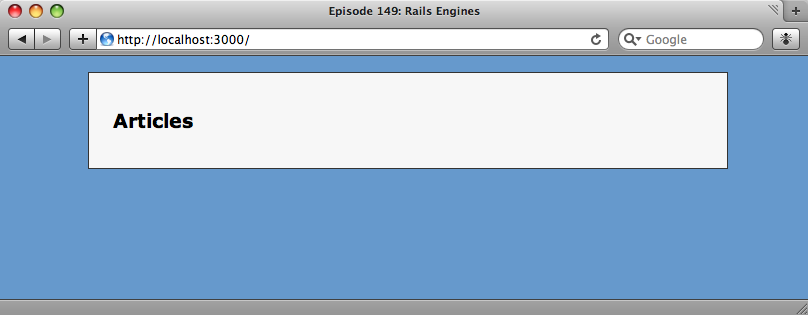
The other is a blogging application that contains articles and allows users to comment on them.

Our blog application on port 3001.
What we’d like to do is add the blogging functionality into the shop, so that it has its own blog. We could merge the two applications, but we’d like to keep the applications as separate as possible so that we could use the blog in other applications too. To do this we’ll embed the blog application into the shop using engines.
Installing Rails 2.3
The first thing we’ll need to do is to ensure that we’re running Rails 2.3 or later. At the time of writing Rails 2.3 is still at the release candidate stage and can be installed with the following command.
sudo gem install rails --source http://gems.rubyonrails.org
Once it’s installed we can check that the correct version is installed by running rails -v . If we see Rails 2.3.0 (or later) returned then we’re ready to go.
Creating a Plugin
Both applications currently live in separate directories. To begin to plug the blog app in we’ll first have to generate a plugin in the shop application.
script/generate plugin blogify
When we generate the plugin it will create a number of files in the /vendor/plugins/blogify directory and it’s this directory into which we’re going to copy the files from our blog app. The first directory we’ll have to copy over is /app.
cp -R ~/rails/blogify/app .
Now we have all of our blog’s models, controllers and views in the plugin’s directory. These directories will automatically be picked up by the application so that we’ll be able to access the articles and comments controllers.
We’ll also need to copy over the routes file from the blog application. We can create a config directory under the plugin’s directory and then copy the file over.
  mkdir config
  cp ~/rails/blogify/config/routes.rb config
After we’ve copied the blog’s routes file over we’ll have to remove the map.root line from it so that it doesn’t conflict with the root controller in the shop’s routes.
Migrating The Migrations
If we start up the server now and try to access the articles controller we’ll get a response, which means that Rails is finding the controller in the plugins directory, but an error will be thrown by the articles page. This is because the database tables that exist in the blog haven’t been created in the shop application. We’re going to have to run the migrations from the blog application against the shop’s database. To start we’ll create a db directory in the plugin’s directory and copy our migrations over.
  mkdir db
  cp -R ~/rails/blogify/db/migrate db
Although the files are now in the correct directory in our plugin’s directory, Rails 2.3 doesn’t know that it should be looking in this directory to find migration files. There’s no easy way to tell Rails that it should be looking here, so what we’re going to do is create a rake task that will sync the plugin’s migrations with the main application’s migrations directory.
Creating The rake Task
Under our plugin’s directory is a tasks directory, and in that directory there should be a file called blogify_tasks.rake. We’ll create our rake task in that file.
  namespace :blogify do
    desc "Sync extra files from blogify plugin"
    task :sync do
      system "rsync -ruv vendor/plugins/blogify/db/migrate db"
    end
  end
Our new rake task will use rsync to sync the migration files in the plugins directory with the ones in the shop’s db directory. (Unfortunately rsync won’t work under Windows).
Having created our rake task we can run it from our shop’s directory and synchronise the migrations.
  rake blogify:sync
  (in /Users/eifion/rails/apps_for_asciicasts/ep149)
  building file list ... done
  migrate/20090226195405_create_articles.rb
  migrate/20090226200008_create_comments.rb
  migrate/20090226202713_add_article_id_to_comments.rb
  sent 944 bytes  received 86 bytes  2060.00 bytes/sec
  total size is 646  speedup is 0.63
Now, each time we modify our plugin we can run our new rake task to synchronise its migrations with our application. Of course once we’ve synced the migrations we’ll still need to run rake db:migrate to update the database.
Success!
Now that we’ve migrated the database we can start the server and run our application again. With the new tables in place the articles index page now works, though obviously there are no articles in it as we’ve just created new, empty tables.
Stylesheets and Layouts
The blog section of our application is now working, but it has picked up the layout file and stylesheets from our shop app. The reason for this is that we have two layout files with the same name, application.html.erb, and a layout file in the application will take precedence over one with the same name in the plugin. Therefore a template from the blog plugin will be rendered with the shop’s layout file. This behaviour also applies to models and controllers, which allows us to override any part of the plugin we choose. As we want our blog to have the same look as the application it’s embedded in, we’ll stick with this.
What, though, if we want to keep a separate layout file and stylesheet for our blog? Back in episode 7 we talked about the different types of layouts available. One of these is a controller-specific layout and, as our blog application has only one controller, this is an ideal way of keeping a separate layout for our blog.
There are only two steps to creating the separate layout. First, we’ll need to rename the layout file in the plugin from application.html.erb to articles.html.erb. Controller layouts take precedence over application layouts so our blog should now use this layout. Secondly we’ll have to copy our blog’s stylesheet over from the original blog app to the shop app’s stylesheets folder. (We can’t copy it to a public/stylesheets directory in the plugin folder as Rails won’t know to look there.)
Images and Javascript
Whether we’re using a separate layout or not, we’ll usually want to copy over some other static content, such and images or Javascript files. We can do this by copying these files from the public directory in our blog app to a public directory under the plugin’s directory. Then, to keep them synchronised we can extend the rake task that we created earlier. If we’re keeping a separate stylesheet as described above then this technique can also be used to keep that in sync, too.
  namespace :blogify do
    desc "Sync extra files from blogify plugin"
    task :sync do
      system "rsync -ruv vendor/plugins/blogify/db/migrate db"
      system "rsync -ruv vendor/plugins/blogify/public ."
    end
  end
The updated rake task now copies the public folder too.
That’s all we’re going to cover on Rails Engines for now. While not suitable for every Rails application you’ll create, they provide a powerful way of embedding one Rails application into another.